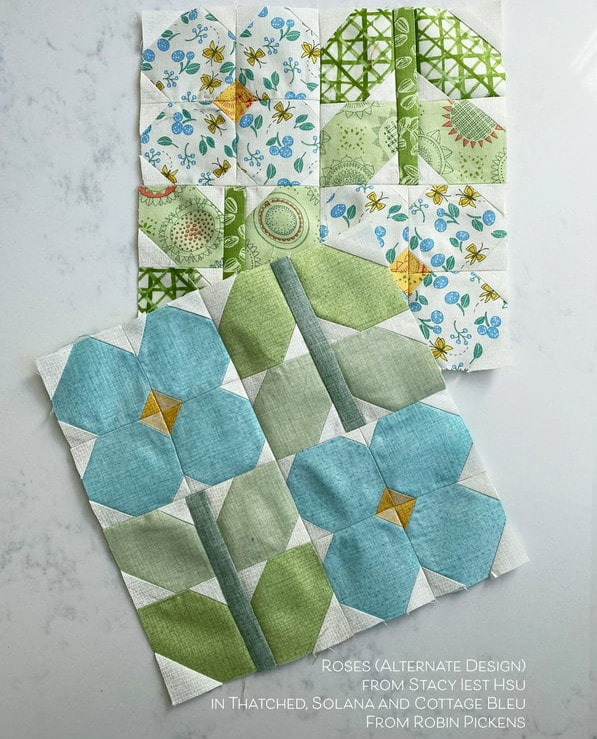
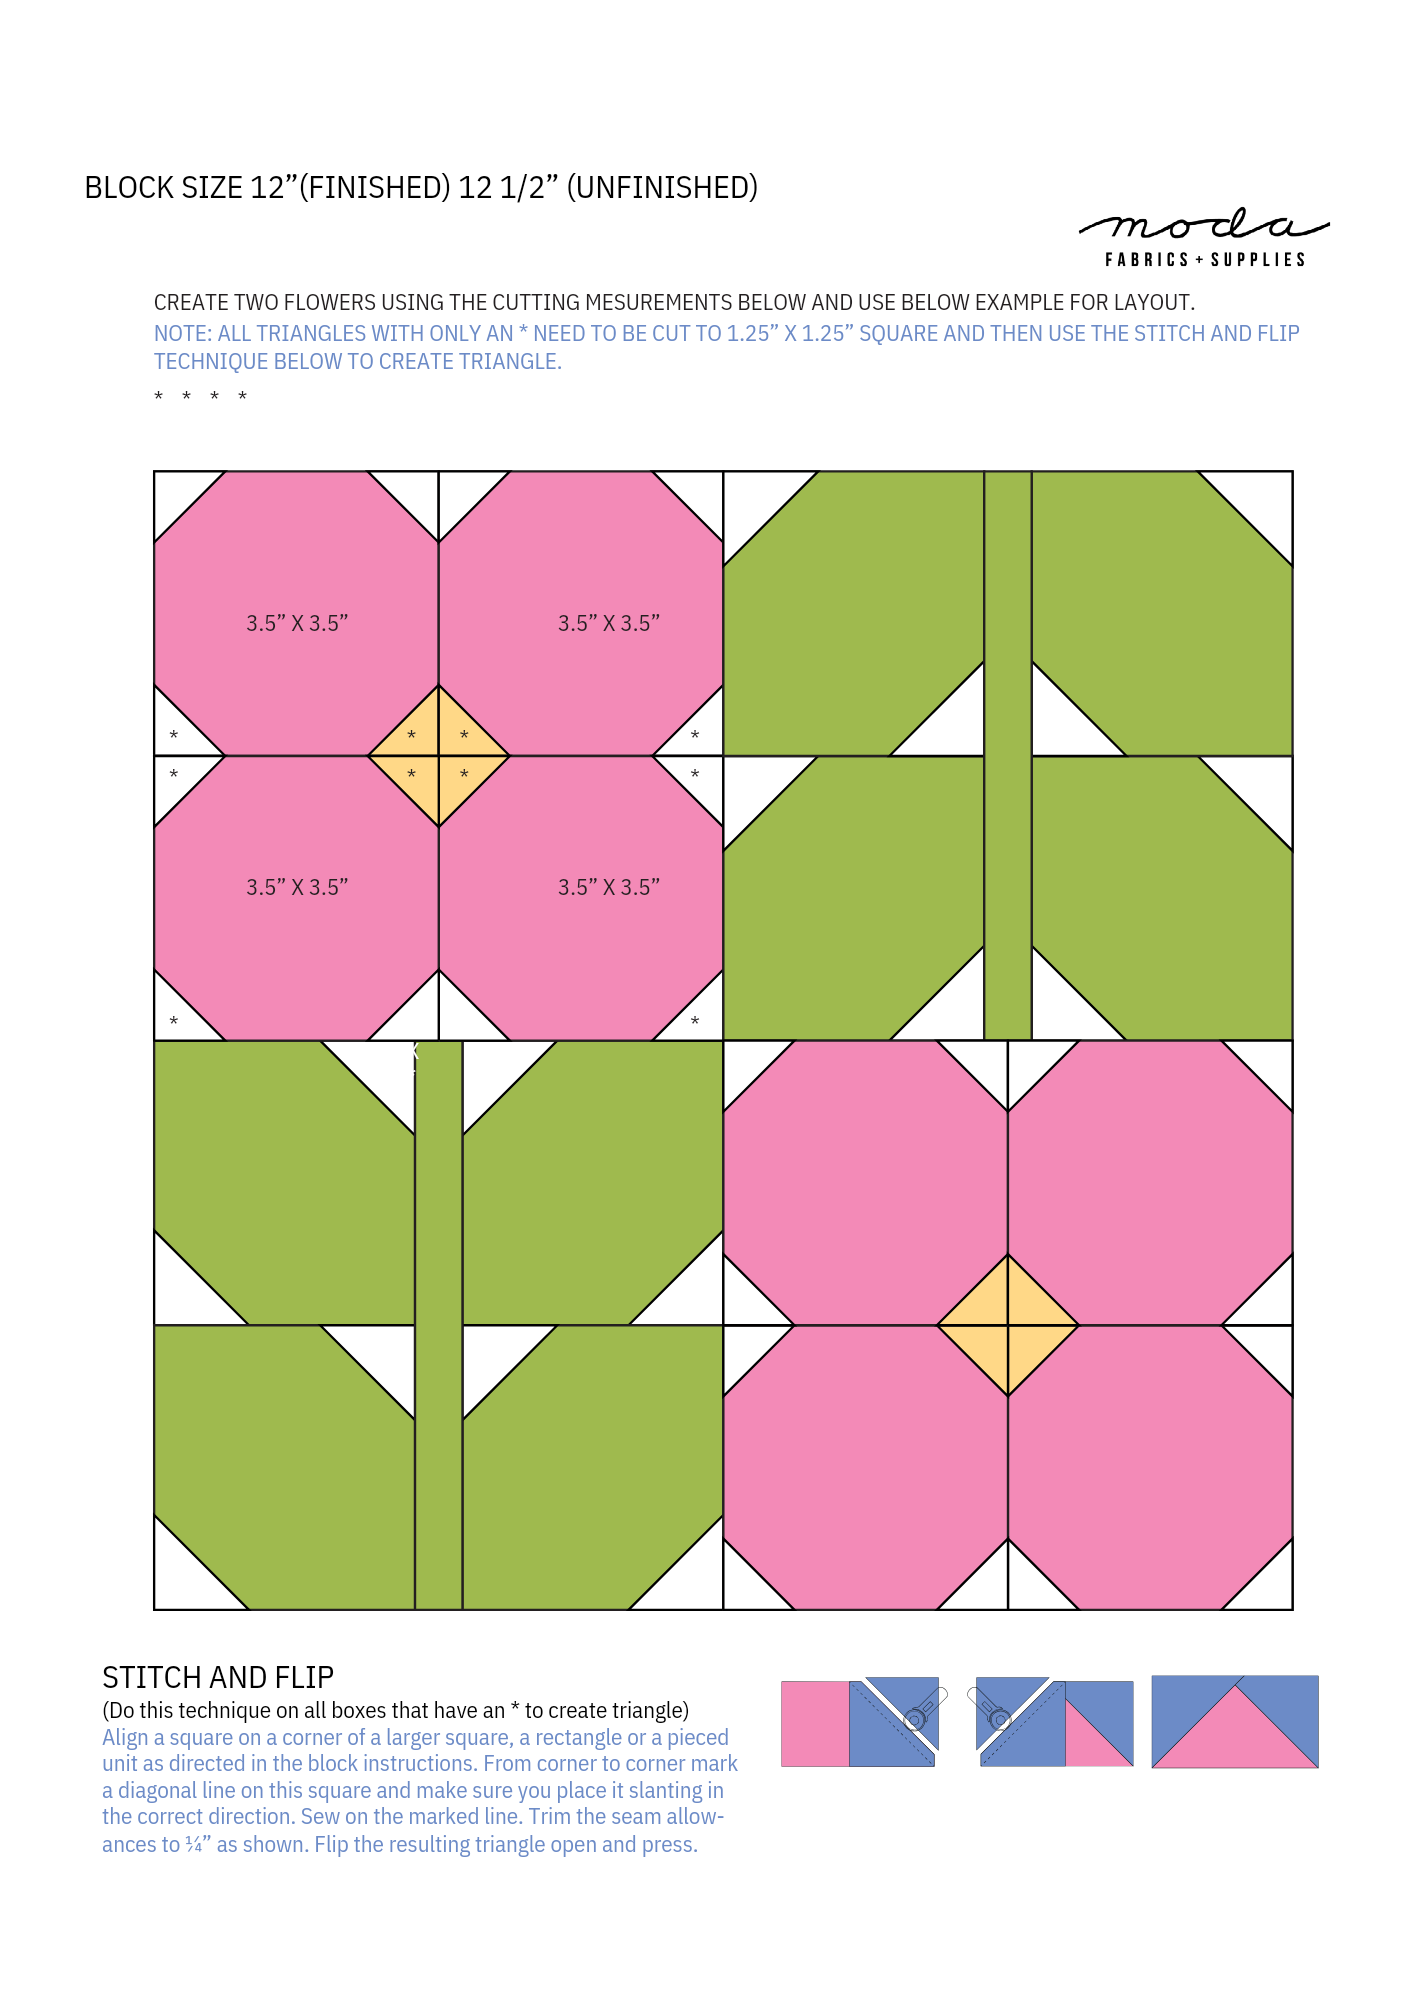
VIRTUAL QUILTERS
  • Home
  • Join
  • Workshops
  • Blog
  • About
  • Member Login
  • Home
  • Join
  • Workshops
  • Blog
  • About
  • Member Login

August Quilt-A-Long, Rose Porch Quilt

7/31/2023

 
PictureClick Photo to see a larger image
I am making a "porch quilt" using a free block pattern from Moda Fabrics.  I thought I would share my project as I made it.  So something new for our group!
Week 1 will be to make the flower portion of the block. I am including videos for those who are visual learners, and some written instructions as well.
By the way, I am going to make 3 of these blocks to make my Porch Quilt, but you can use it for other things, including a pillow, table runner, placemats, bag, and a quilt of any size.
Thanks,
Ann Nolen
Ann@VirtualQuilters.com
​(Click Read More link below on the right to see rest of article)

LESSON 1 - Make the Flower Components
FOR EACH FLOWER COMPONENT MADE (MAKE 2 PER BLOCK)
4 squares 3-1/2 inches square (flower fabric)
4 squares 1-1/4 inch square (flower center fabric)
12 squares 1-1/4 inch square (background triangles fabric)
  • Cut squares per list above
  • Draw a  diagonal guide line on the back of each 1-1/4 inch square.  Be sure to use something removable (for example iron erasable, frixion pen, water erasable or chalk)
  • Position small blocks on 3-1/2 inch blocks, right sides together, per the chart (download chart below). 
  • Stitch the line and flip the fabric to create triangles on the corners.
  • Trip seam to 1/4 inch 
  • Press components
  • Sew 4 components together to create Flower.  Should measure 6-1/2 inches square, trim as needed.

​Here is the Lesson 1 Chart of the block to view, save, or print:
week_1_chart.png
File Size: 174 kb
File Type: png
Download File


The video below shows the Flower component construction:

Here is a YouTube video showing the Stitch and Flip method used:
LESSON 2 - Make the Leaf Components
FOR EACH LEAF COMPONENT MADE (MAKE 2 PER BLOCK)
​
4 rectangles 3-1/2 X 3-1/4 inches (leaf fabric)
1 rectangle 6-1/2 x 1 inch  (leaf fabric)
8 squares 1-1/2 inch square (background triangles fabric)
  • Cut squares and rectangles per list above
  • Draw a  diagonal guide line on the back of each 1-1/2 inch square.  Be sure to use something removable (for example iron erasable, frixion pen, water erasable or chalk)
  • Position small blocks on 3-1/2 inch blocks, right sides together, per the chart (download chart - Lesson 2 below). 
  • Stitch the line and flip the fabric to create triangles on the corners.
  • Trim seam to 1/4 inch 
  • Press components
  • Sew 2 left side components together.  Sew 2 right side components together. Stitch each to the center leaf stem piece, using the fabric placement in the chart. Should measure 6-1/2 inches square, trim as needed.
​
​Here is the Lesson 2 Chart of the block to view, save, or print:
chart_-_lesson_2.pdf
File Size: 74 kb
File Type: pdf
Download File


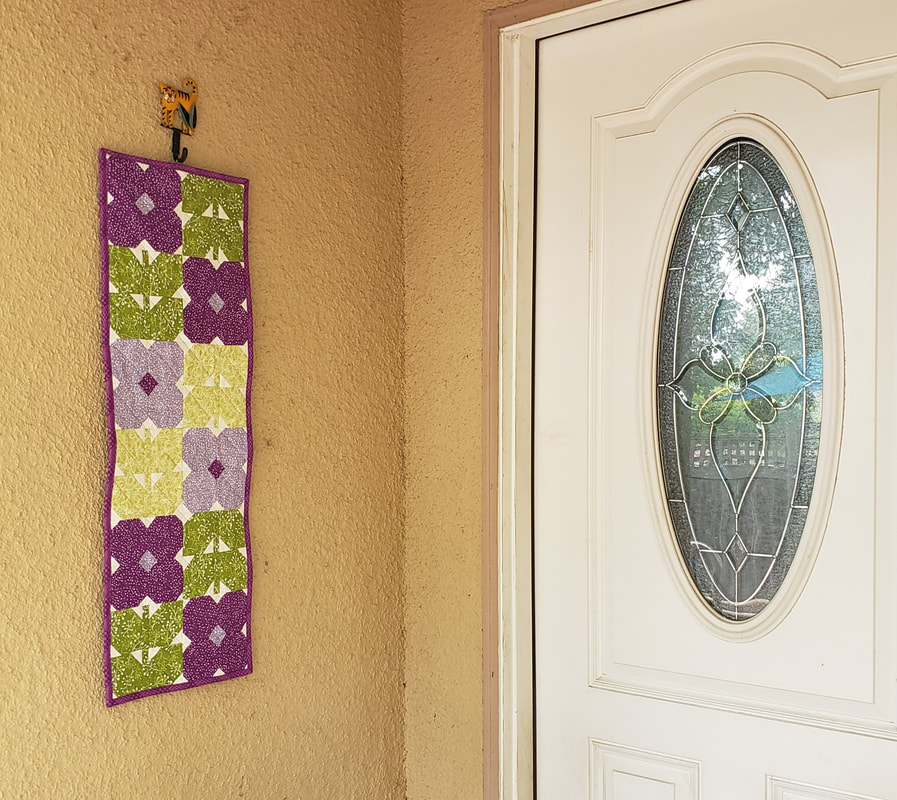
Porch Quilt is Finished!!!
I finished my little project and thought I would share how I decided to finish it.  I hope the information is useful for you.
  • Walking Foot quilting - straight lines at a 45 degree angle
  • Clever corner pockets for hanging (thanks to Mel Beach for teaching me this method)
  • Binding and done
Picture
Watch my video for all the details on what I did:

Comments are closed.
    Current Quilt Workshops & Challenges
    These are our current workshops and Challenges. Most are free.
    Occasionally, we hire a pro quilt teacher, and we charge only enough to cover their free.
    ​All workshops are online or on Zoom.
Picture
Virtual Quilters
www.VirtualQuilters.com
​Contact us by email at Ann@VirtualQuilters.com