|
As quilters, it seems that we can never have enough blocks to use up our scraps. This is one block that uses strips, and they don't even have to be the same widths. I love the improv approach to them. This short video from You Tube shows the simple procedure, and you can go from there to whatever size looks good. Square, on point, or whatever fun you want to get into!
0 Comments
I just can't believe that Valentines Day is next month, time is flying by! I thought this heart quilt border was perfect for the season, and hearts are fun to add almost anytime. Everything you need to know is here in the video. Enjoy!
Ann Members - I have also posted this in our Pattern Library. (You Tube video by Teresa Down Under) This is a perfect post to start out 2023, Happy New Year!
I follow quilt designer and teacher Krista Moser online, and she often has really useful posts on her blog. This was one of them, with free download of a quilt journal page to help keep track of your projects so you can restart them without hassle. I think this will be my first New Years Resolution this year! Below is her video, but if you would like to check out her blog for yourself, you can find her at her website www.KristaMoser.com Ann
Recently, I have fallen in love with choosing a nice quilt block, and then using my scraps and left over jelly roll strips to make it until it results in a beautiful but easy quilt. This video shows just that, with clear instructions in the video so you don't need a pattern.
Beth Shibley says: Sew along with me as I make this easy quilt block with some soft and pretty batik fabrics. I am using 2 1/2" strips....but a jelly roll would work as well. My quilt has 42 blocks...so I needed 42 strips of fabric. I was able to get TWO blocks from TWO strips of fabric. Each block is 8 1/2" x 8 1/2" Thank you to Beth. If you want to see more of her blocks and patterns: Click Here I happen to love doing Paper Piecing. I recently saw a different teacher demonstrate how to do it, and they totally confused me! So I thought I would share this beautiful pattern, Celebration Wreath, and the great videos I like on the technique. It is the same method I first learned from a local teacher, and I love using Carol Doak's paper. Each of us is different, but I hope this is helpful.
Ann PS - Thank you to our member that suggested this free pattern! 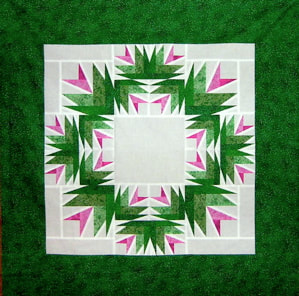
Celebration Wreath pattern by Carol Doak
Members: The free pattern, Celebration Wreath, is available to download in our Pattern Library. (Becoming a member is free, to get more info CLICK HERE. )
Below is the same template in a 6 inch size block. Again, free from Carol Doak.
Here is a technique that you might consider trying! I had my doubts, but it worked so easy and fast! Just like in the video. If you haven't heard of this, you will want to give it a try.
Ann PS: Once you have the seam unsewn, use a sticky lint roller to pick up the bits of thread. Voila! Done. Below is a short video showing the technique in closeup view:
I recently discovered the Hera Marker made by Clover. Inexpensive and can be used for finger pressing seams open. I tried it and it works great!
I found another video that showed how to use the Hera Marker to make lines for Free Motion Quilting or Walking Foot Quilting. Check it out below. I love Jen Kingwell's quilts and patterns. In this short video she talks about how she approaches choosing fabric or a color pallette with her wonderful scrappy quilts.
If you aren't familiar with this famous quilter from Australia, use this link to her website patterns page: https://www.jenkingwelldesigns.com/jen-kingwell/ --Ann I love this cute and quick Improv Christmas Tree Block from Amy Smart of DiaryOfAQuilter.com. Make a bunch of them to create a wall hanging, a quilt, a table runner, or even a fabric bag. Watch this video to learn how to create the block in any size you decide.
OR IF YOU PREFER - USE THESE EXACT MEASUREMENTS BELOW FROM AMY SMART TO MAKE THE MINI QUILT WALL HANGING: You can make this following the video above, or go direct to her blog post for more info at https://www.diaryofaquilter.com/patchwork-tree-quilt-block-tutorial/
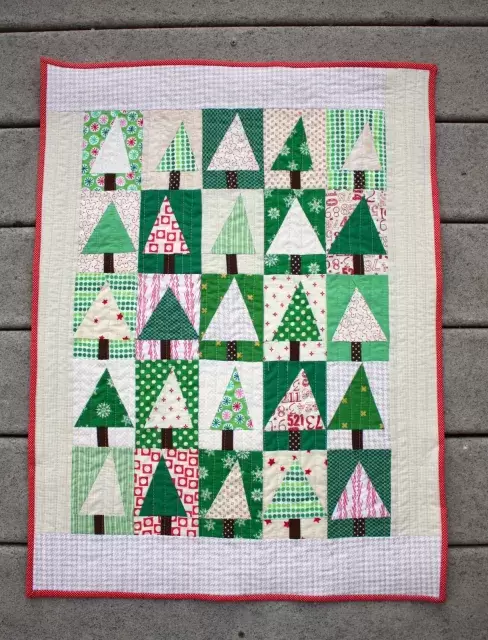
I sewed 25 Christmas tree quilt blocks into a mini quilt. My borders are 2 ½″ wide finished, but you can certainly make yours however you so desire. Remember, this doesn’t need to be perfect. A little bit wonky and a little bit improv-y makes a statement too. Feel free to make it your own.
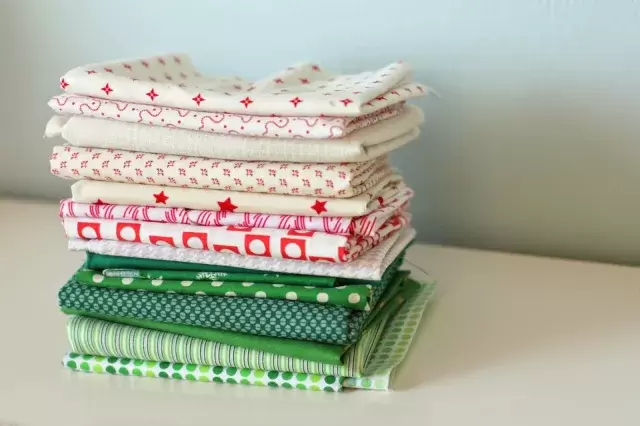
For my palette I chose a variety of greens in different shades and scales, to create interest and depth. I paired the greens with white-background prints and pulled in just a little bit of red. I like that it gives a hint of Christmas, while still letting the green and white be the dominant colors. You’ll also need a few scraps of brown for the trunks.
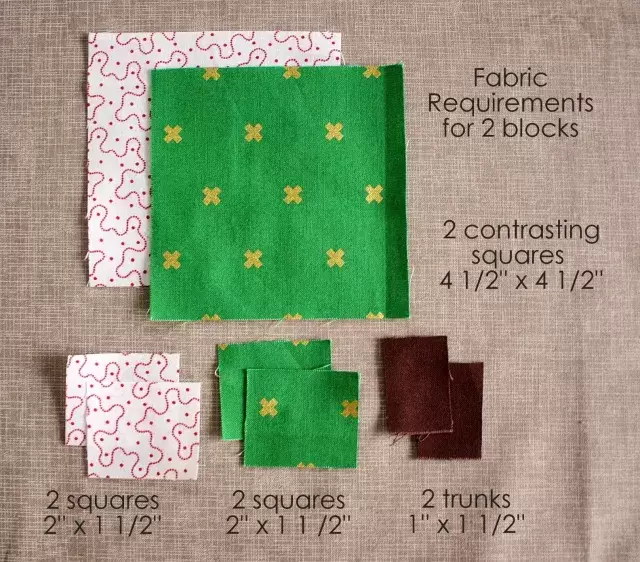
Using this method you’ll be making two tree blocks at the same time. First pick two contrasting fabrics. From each fabric cut a 4 ½” x 4 ½” square and two 2” x 1 ½” rectangles. From the brown scraps cut two 1” x 1 ½” rectangles.
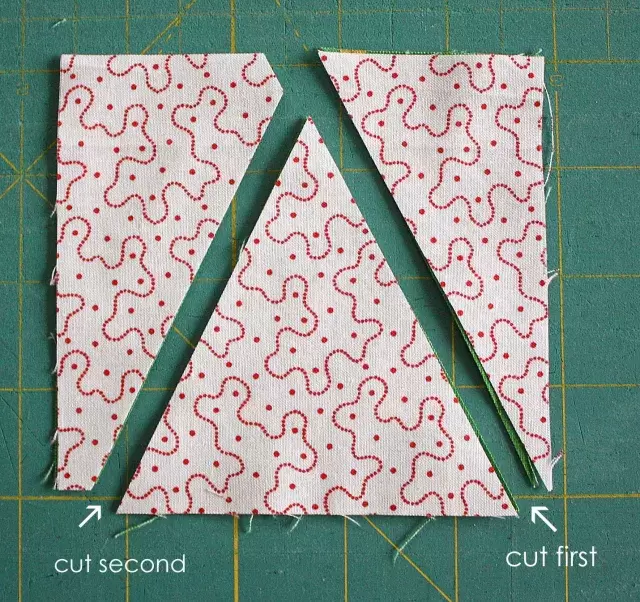
Stack the two 4 ½” x 4 ½” squares on top of each other, with both right sides facing up. Using a ruler and a rotary cutter, cut one side of your ‘tree shape. Pull the right side away and make a second diagonal cut to create a triangle ‘tree’ shape. Keep these pairs together, if you are mass-cutting your blocks at once.
You can cut all of your pairs the same way (such as 60 degree triangles) or you can cut each pair slightly different by cutting the triangles at different heights, angles, etc. I really loved giving the trees a little bit of personality and making them all different. This project is very ‘improv’ inspired, so have fun experimenting!
I love this technique shared by Krista Moser on her blog at www.kristamoser.com. She uses a Creative Grids ruler she designed, but using a 60 degree angle, you could also do this with other rulers. Of course, her ruler would be ideal for this project.
JUST ONE CUT TABLE RUNNER by Krista Moser 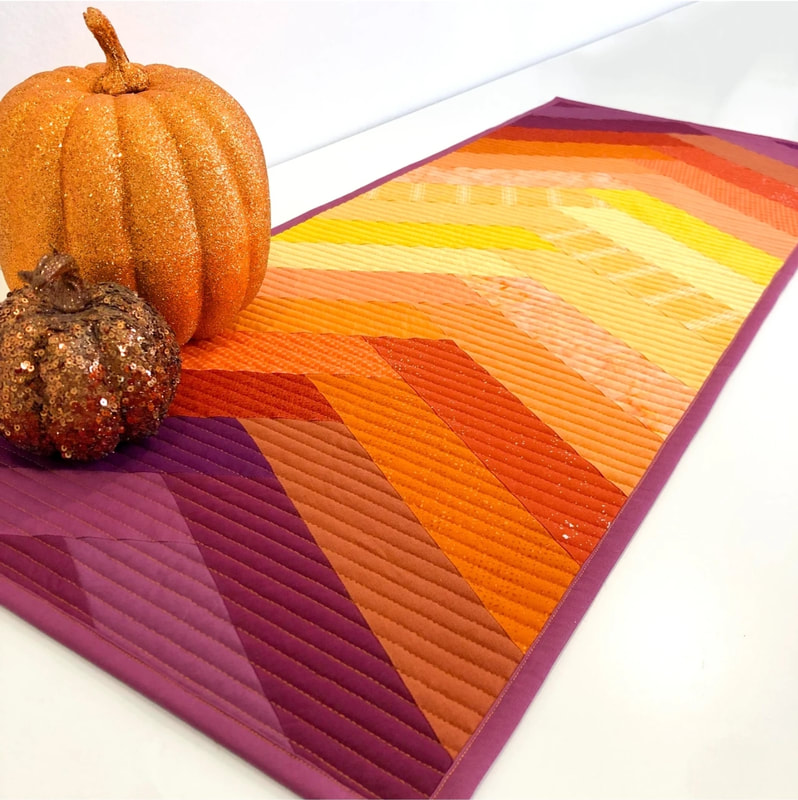
What kind of design can you make with just one cut? I had fun playing around this week and came up with this woven braid-style table runner! I had a pile of orphan 2 ½” strips in all kinds of fall colors and thought it would be fun to use them up in a new way.
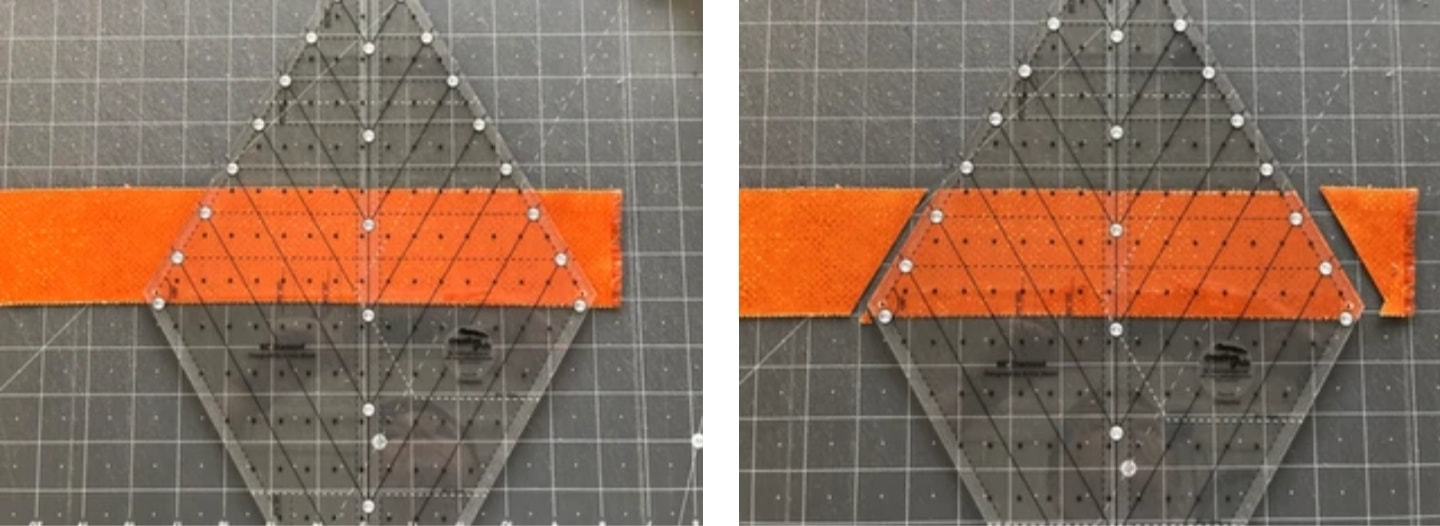
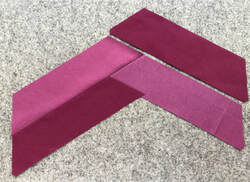
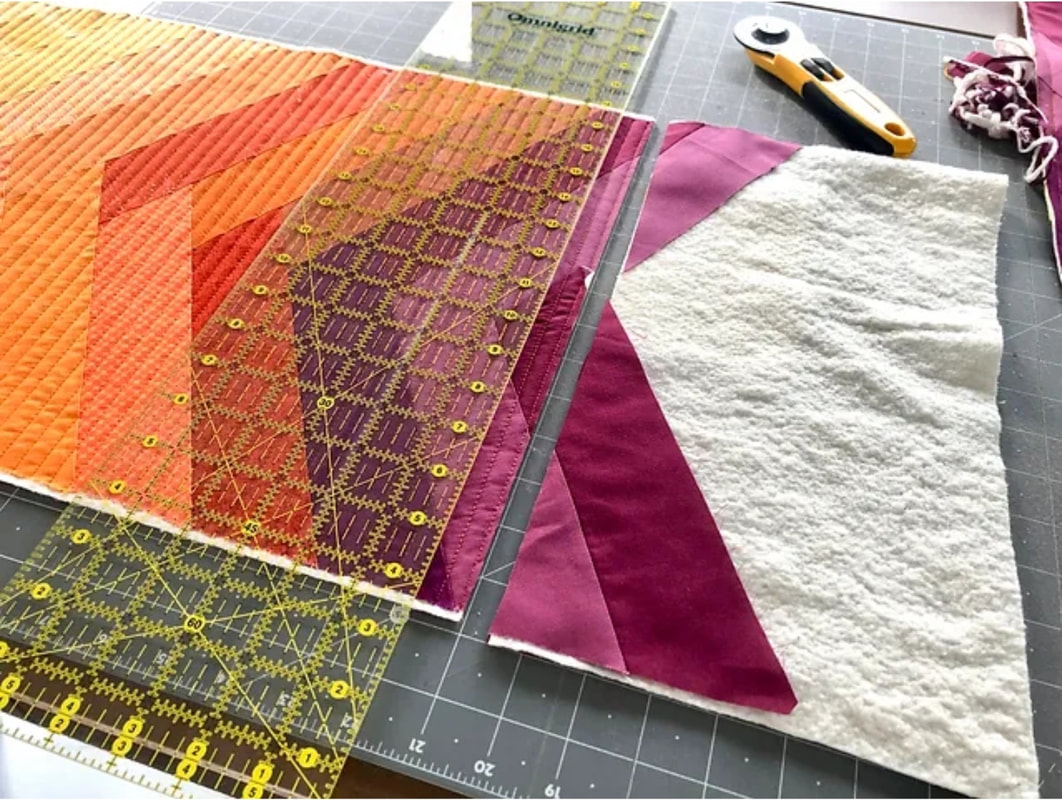
First, I cut 8 ½” trapezoids from the 2 ½” strips. I used the Large 60-Degree Diamond Ruler for this step. Using the triangle lines on the ruler, align the 8 ½” line with the bottom of the strip and the 6” star/burr line with the top of the strip. Cut on both sides of the ruler, and trim the outside corners off flat. Rotate the ruler 180 degrees to make the next cut.
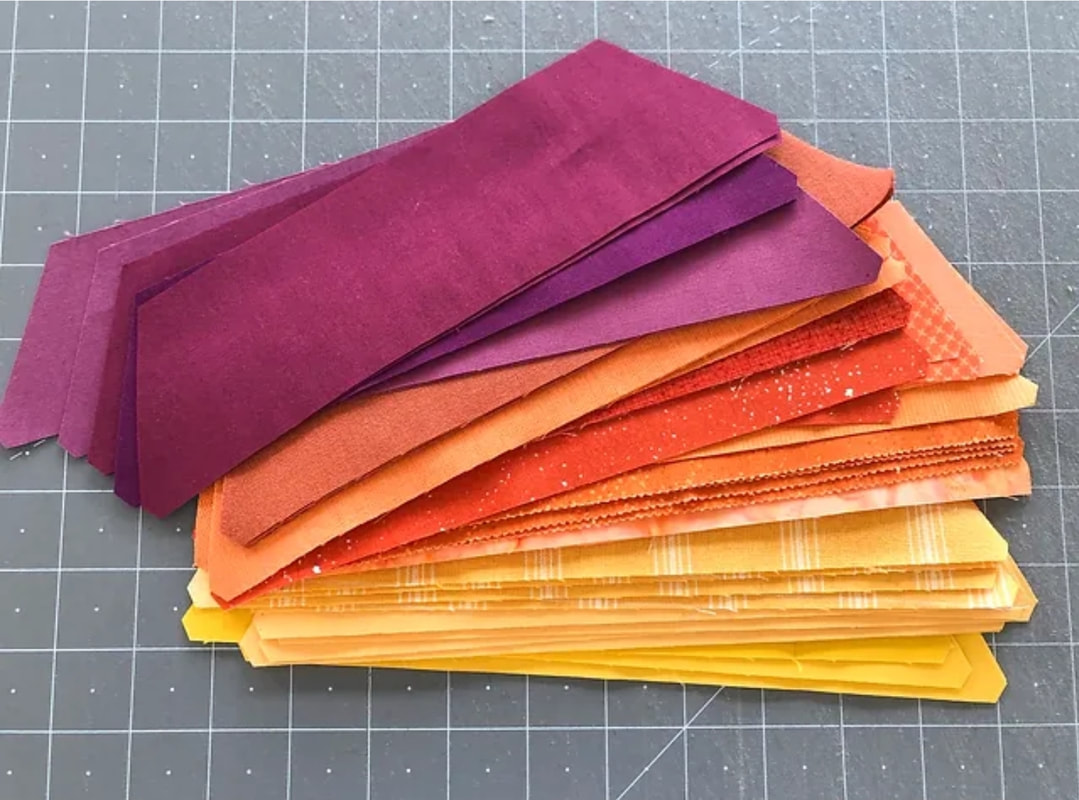
I got a little carried away and cut a huge pile of these trapezoids. I ended up only using 34 of these for my table runner and it still came out 36” long.
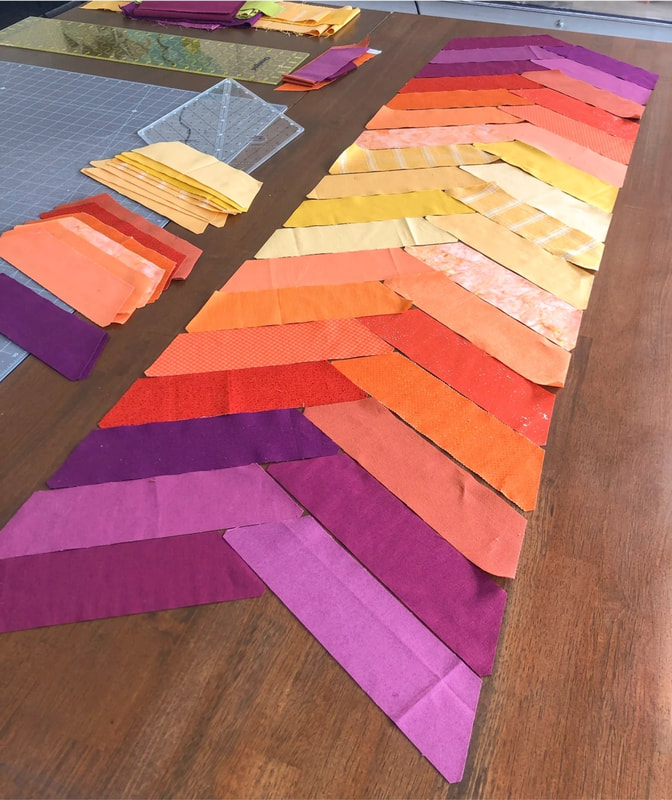
Now, for the layout. This was fun! I thought I'd mix all the colors up, but in the end, I ended up liking a more ombre layout… no surprise there :) Here you see each one overlapping the next one.
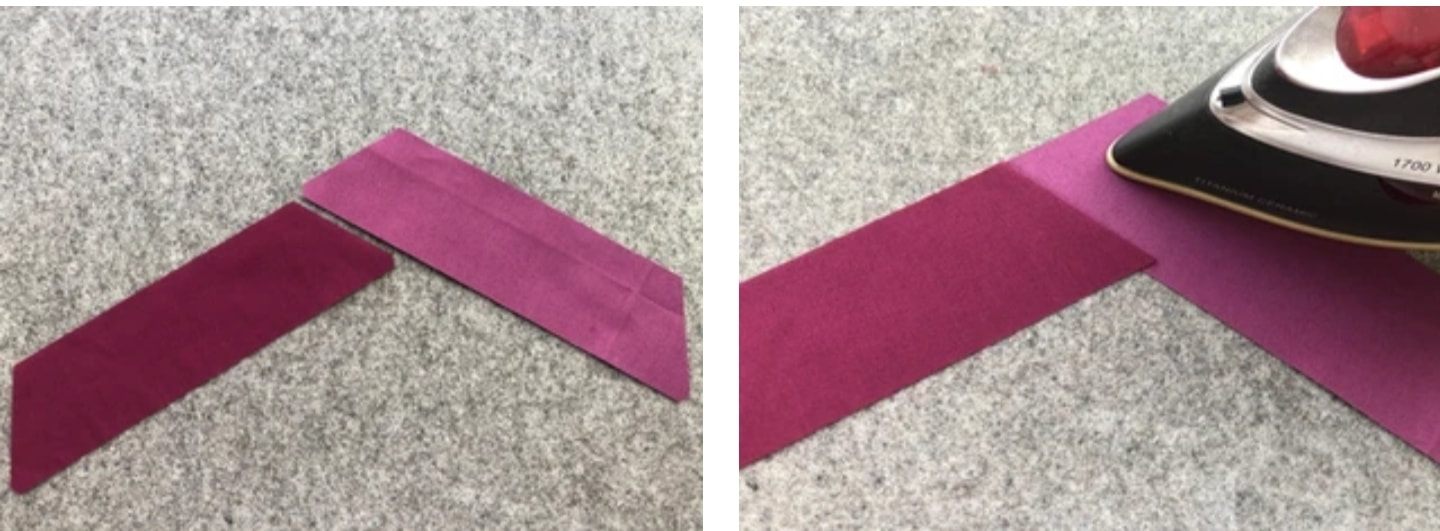
Okay, now to sew it together. I took the first two pieces and sewed the short seam to join the left piece to the underside of the right piece. Press that seam out.
Add the next piece to the top left, and use the flat tips as a match-up point on either end to center the piece before sewing.
Press that seam out once sewn.
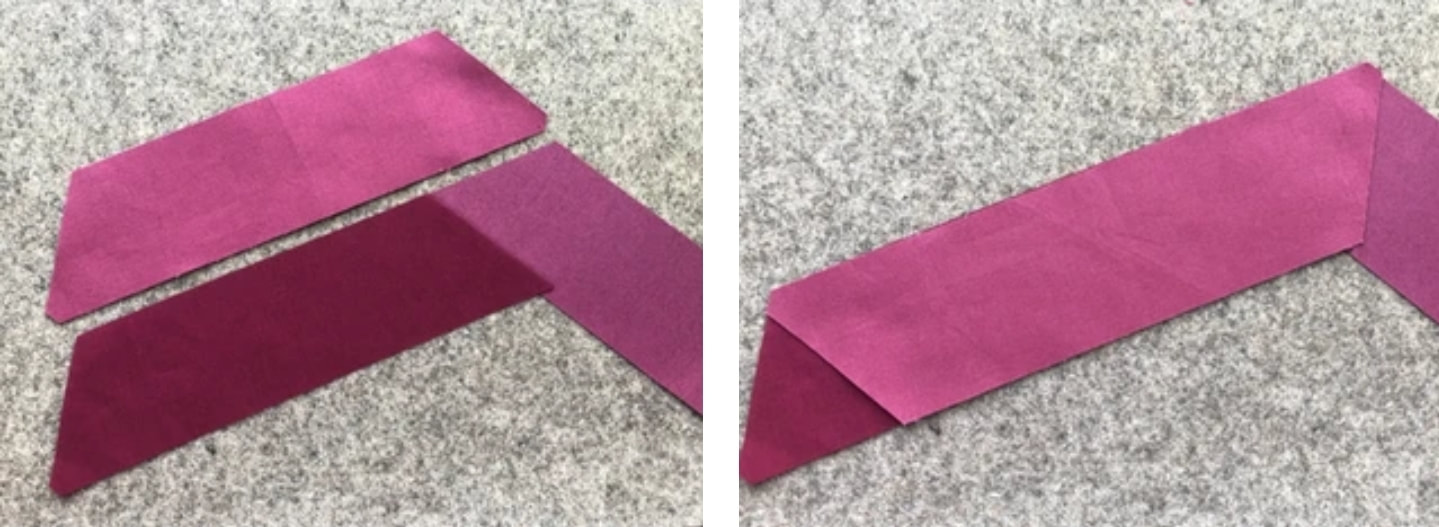
Add a piece to the top right, sew, and press each new piece.
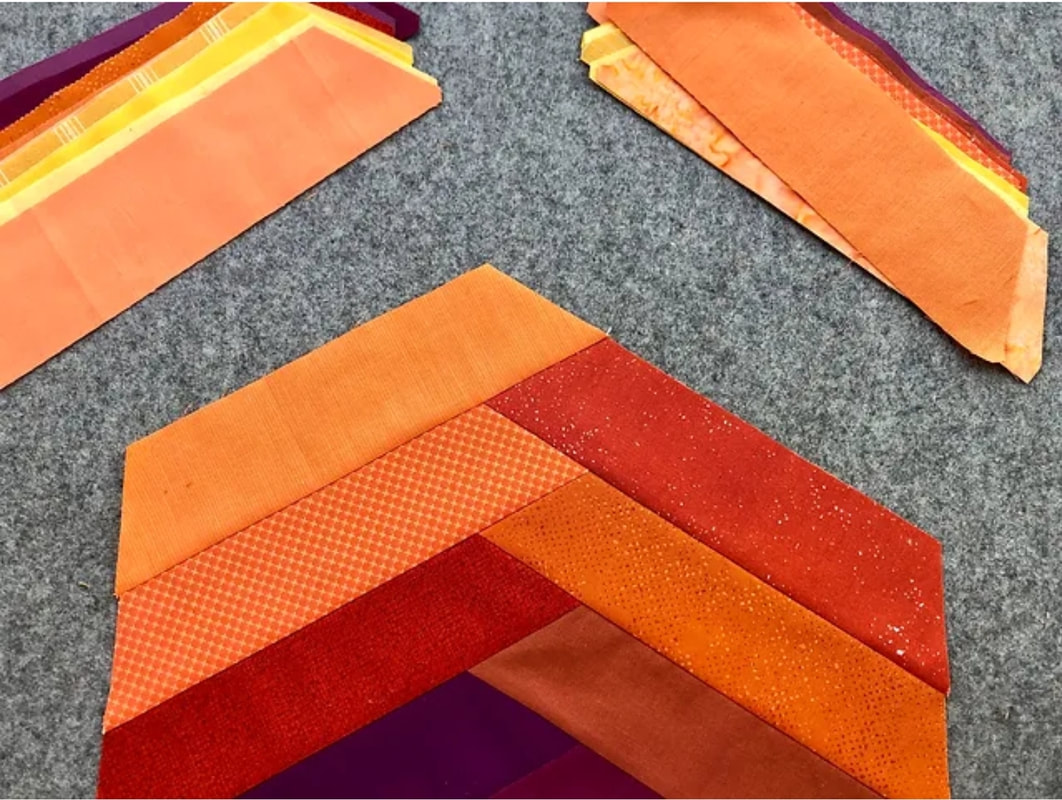
Alternating right and left, add one piece at a time, pressing each seam out before adding the next piece.
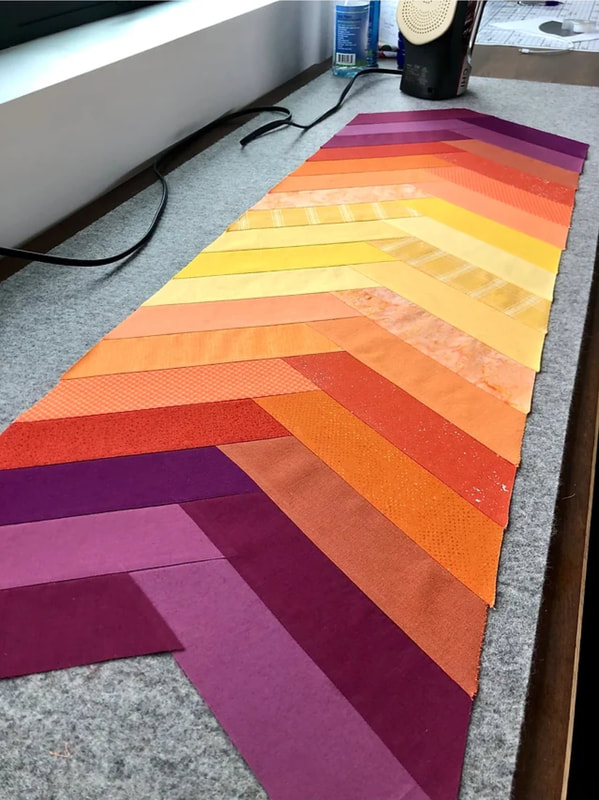
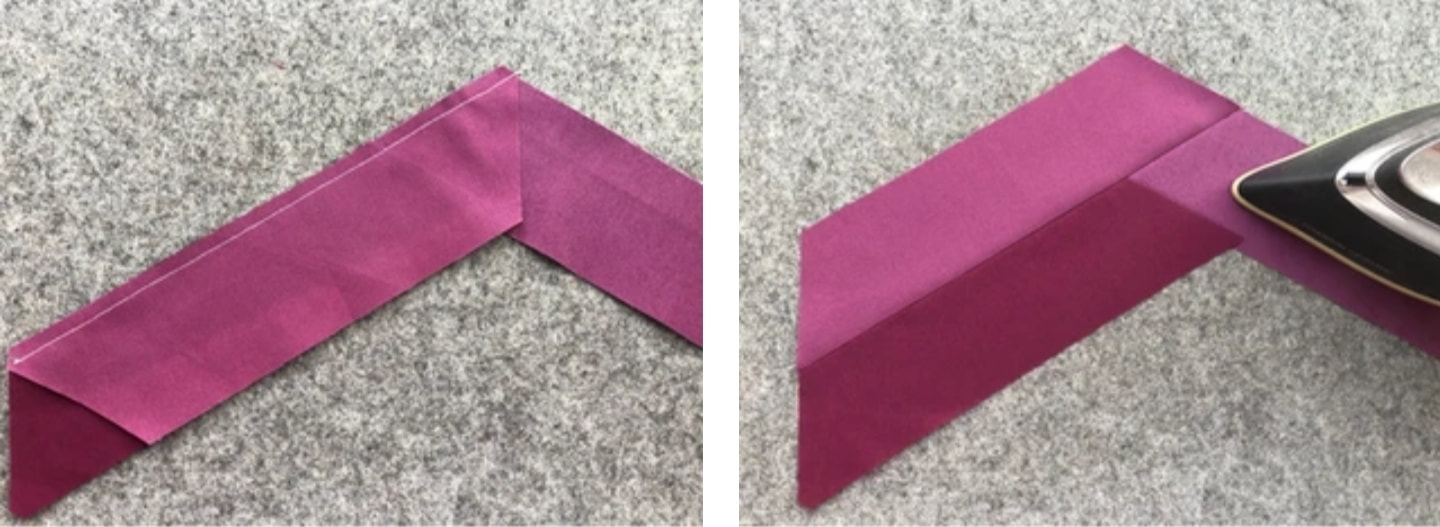
I kept adding trapezoids until my table runner was as long as I wanted. This would be fun to do in a quilt-as-you-go method as well. So easy and pretty fast too!
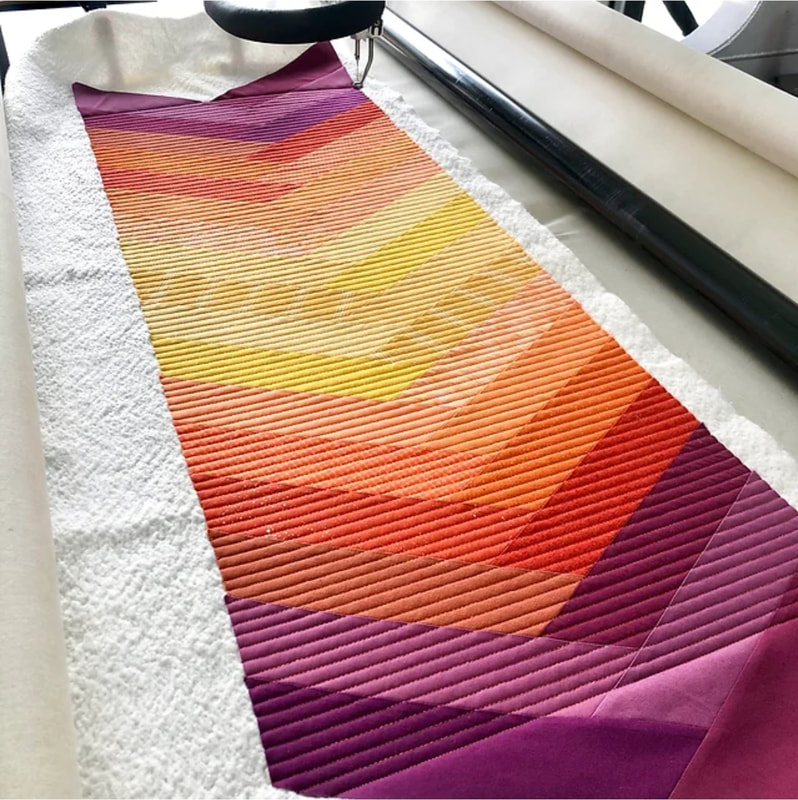
I just quilted mine with straight lines ¼” apart on the longarm. I planned to cut both ends off straight, so I didn’t bother quilting the areas that would get cut off.
Trim the whole thing up and straighten out the ends. I bound it with a 2 ¼” binding.
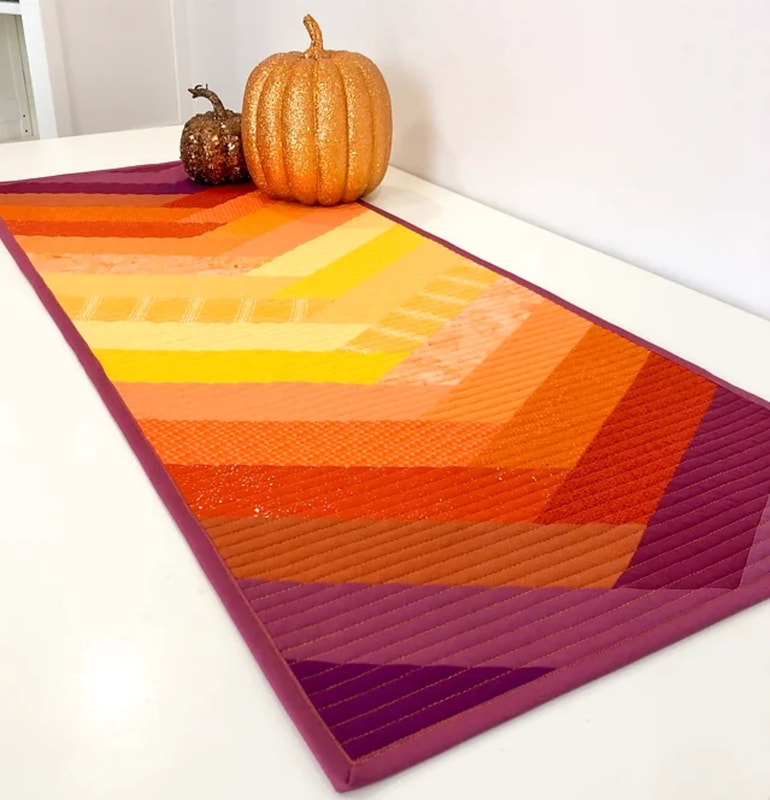
And here it is! I had so much fun with this super simple scrap project, I already have plans to make a few more. This table runner came out 14½” wide and 36” long. If I started with 6 ½” trapezoids, this table runner would only be about 10½” wide. You could make a cut heart runner from 4½” trapezoids. Wouldn't that be cute in a candy cane colors?! Krista When I saw this blog post, I knew our Virtual Quilters would use this! Thank you to Paige from QuiltingWemple.com for this information. She explains that these are design that only look difficult, but with some marking are quite easy. She uses a Hera marker that "creases" the fabric for marking, and since I am not familiar with that, I have ordered one to try out. I will update you on that soon.
You can reach the original post at her blog: https://quiltingwemple.com/7-easy-border-quilting-ideas/ --Thanks, Ann 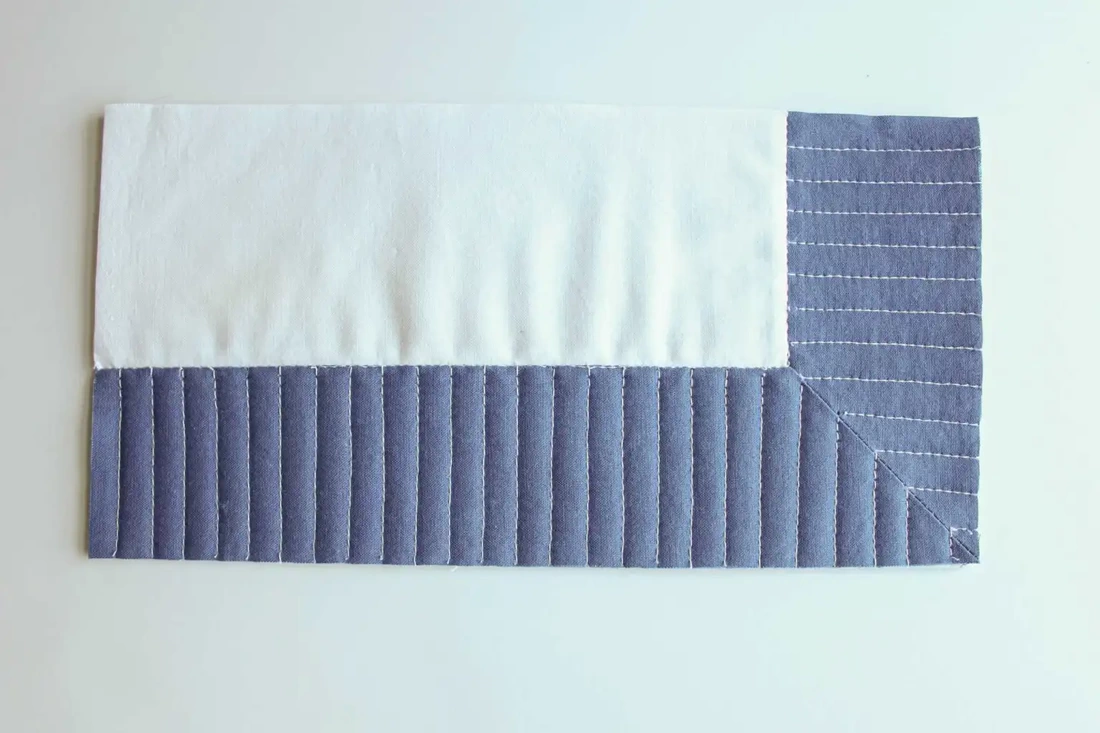
Piano Keys - Walking Foot Border Design
This one is a classic, and is likely everywhere on the internet, I get that, but it’s so popular (and easy) that I had to include it.
All it is is straight lines running perpendicular to make a “T” with the border you are quilting. I find it easier to start on the inner edge of the block and quilt out to the border edge so you can drop your needle exactly where you want it. Instead of working your way in and putting strain on your eyes to try and figure out if you ended in the right spot. ProTip: To keep the lines straight use some sort of guide, whether it’s the edge of your walking foot or a quilting guide for larger spaces. The one I use is universal to most walking feet. This is the only border quilting design on this list that can be adapted for borders that aren’t straight lined; which is why it’s at the top of the list. My double wedding ring quilt is a great example of how versatile this simple design really is, the rings are curved, but the straight lines around the edge of the quilt just follow the design and end wherever it hits a ring. 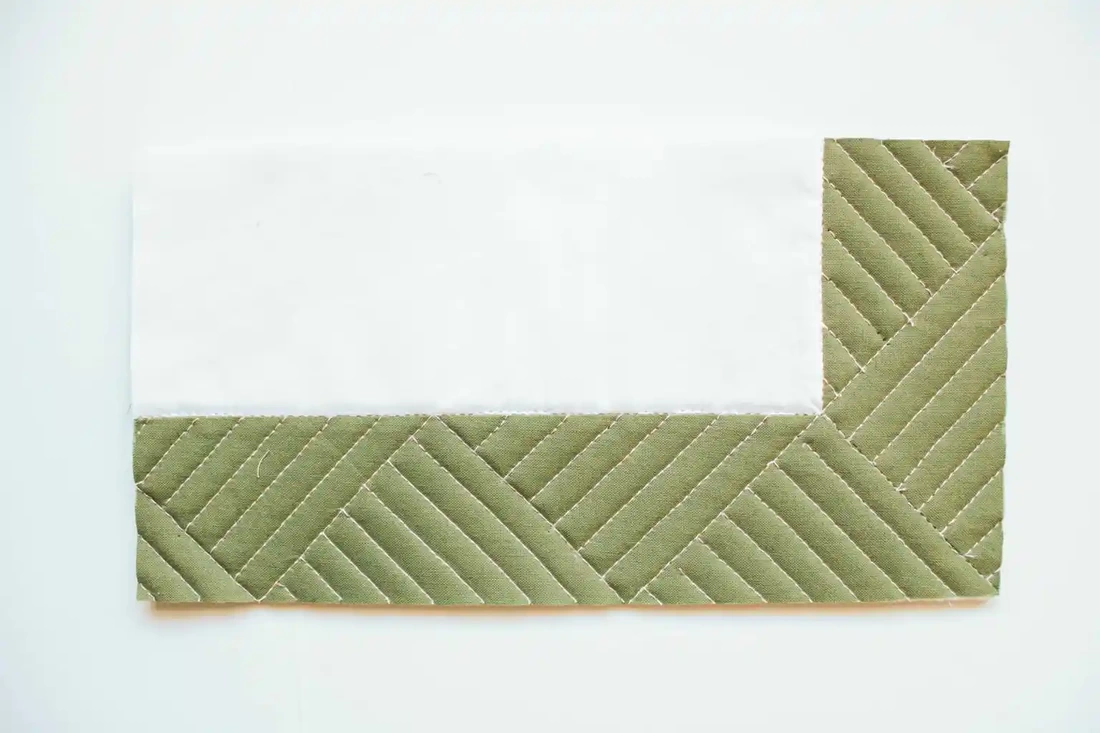
Triangles - Walking Foot Border Design
A very modern and geometric version of the piano keys, start by marking out triangles that zig zag across your border. You may need to make a triangle bigger or smaller to make the corner turn nicely. Then quilt your zigzag.
Using those straight lines, follow the zigzag line, altering directions with each triangle piece. Just be sure to reinforce stitching at the starts and stops! 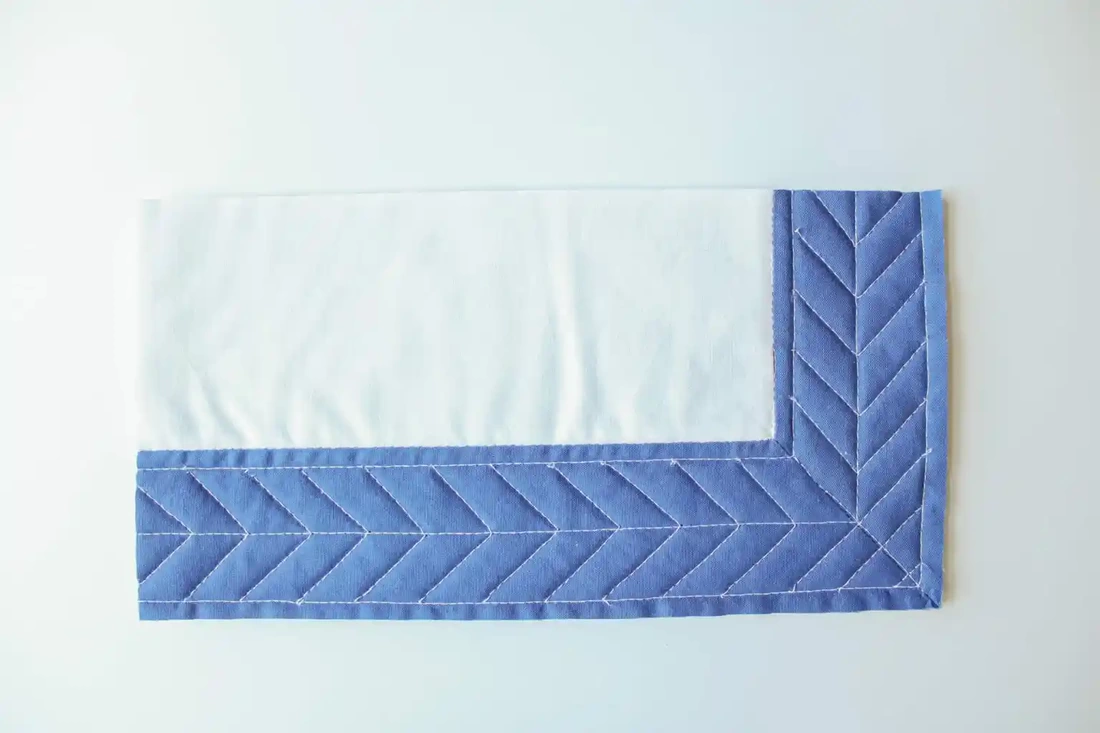
Herringbone - Walking Foot Border Design
Everyone loves a good herringbone.
This one is simple, whether you include a border like I did or not, mark a single line down the center with the help of a ruler, the marking will help keep it perfectly centered as you stitch it. Go back with your ruler and Hera marker and mark out perfectly spaced chevron lines on each side. To save time, it’s easiest to do this in bulk a side at a time. This way you know your herringbone will have a consistently spaced chevron and both sides will end at the same point to give you that great design. 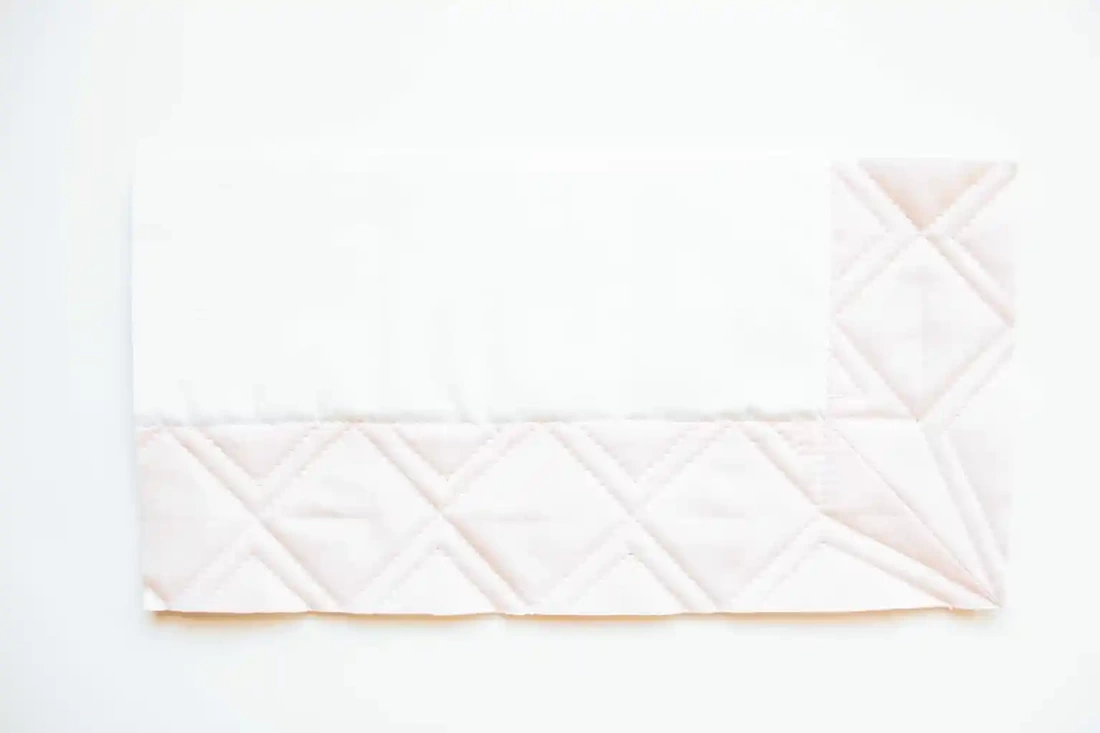
Simple Squares - Walking Foot Border Design
Maybe you have squares in a pieced border, or maybe you just want to add some interest to a solid color border.
Either way this is a great, easy, and QUICK one. I like to start at one corner and just using the right angle of my ruler mark out two zig zags across the border side that meet up to make the square! You may need to adjust towards the end so you don’t end up with a half square when you get to the next corner, but the beauty of marking ahead is that you have all the time in the world to play with it before committing. When you quilt it, quilt it like a zig zag (half at a time) instead of a square, you’ll keep moving and you won’t have to push and pull the quilt so much. 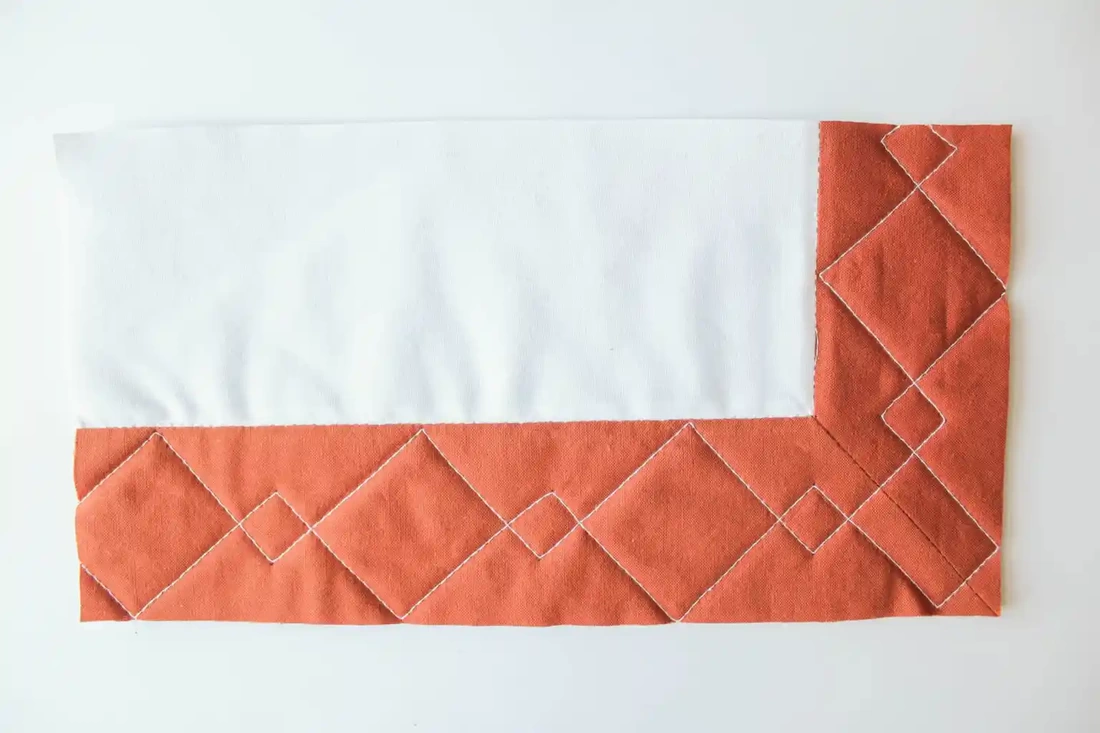
Interlocking Squares - Walking Foot Border Design
The interlocking squares build off the concept of the simple squares and makes it a little more fancy. To quilt, instead of marking the middle of the width of the border, make marks at the 1/3 and 2/3 points and run them the full length of the border. Do not quilt these lines, they are for reference only.
Instead of marking from one edge of the border all the way to the other edge like in the simple squares, mark from an outer edge, across the first 1/3 reference line, and stop at the second. Make your 90 degree angle, and mark all the way back out to the outer edge of the border. Do the same thing on the inner side of the border, crossing the closer 1/3 reference line and stopping at the second. Other than that it’s just a zig zag! 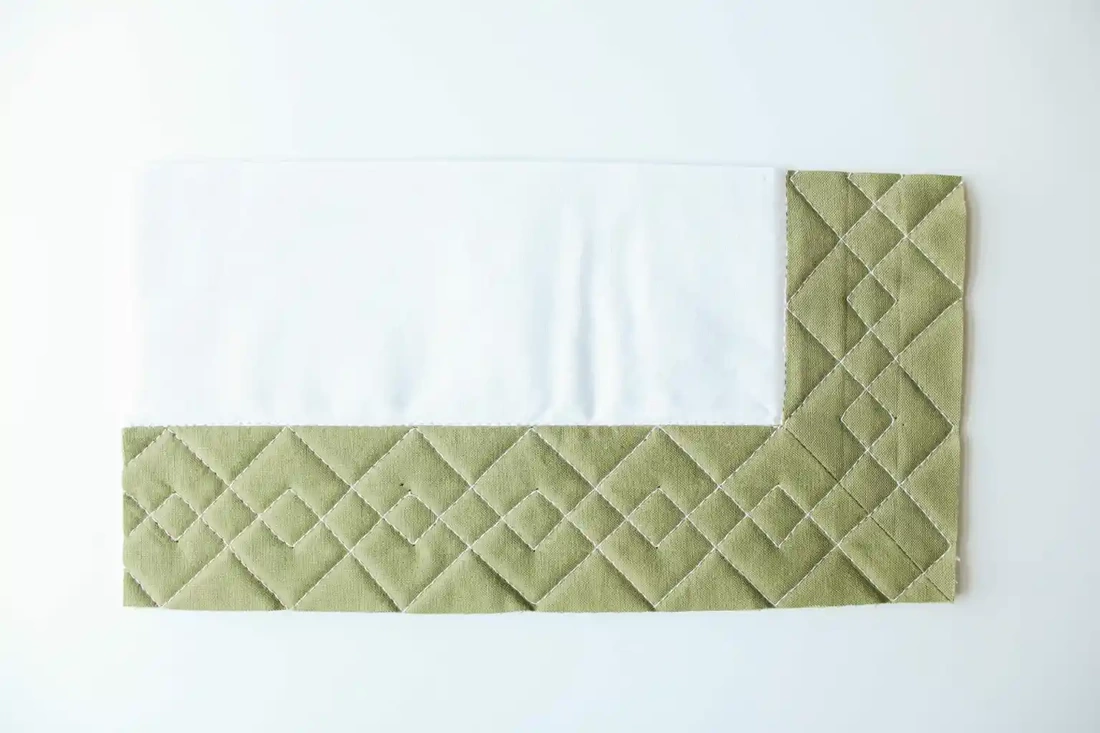 The Knot - Walking Foot Border Design The Knot - Walking Foot Border Design
Even fancier still, but no more difficult to do, this knot design is created by making two interlocking square designs that are offset from each other.
To start, make the interlocking squares from above. Now repeat the two zig zags, on top of the original two, using those same 1/3 reference lines. Except this time, off set them from the first set so where the original set made a big square, the new lines will cross for the small square. I love that this design is as simple as four zig zag lines. 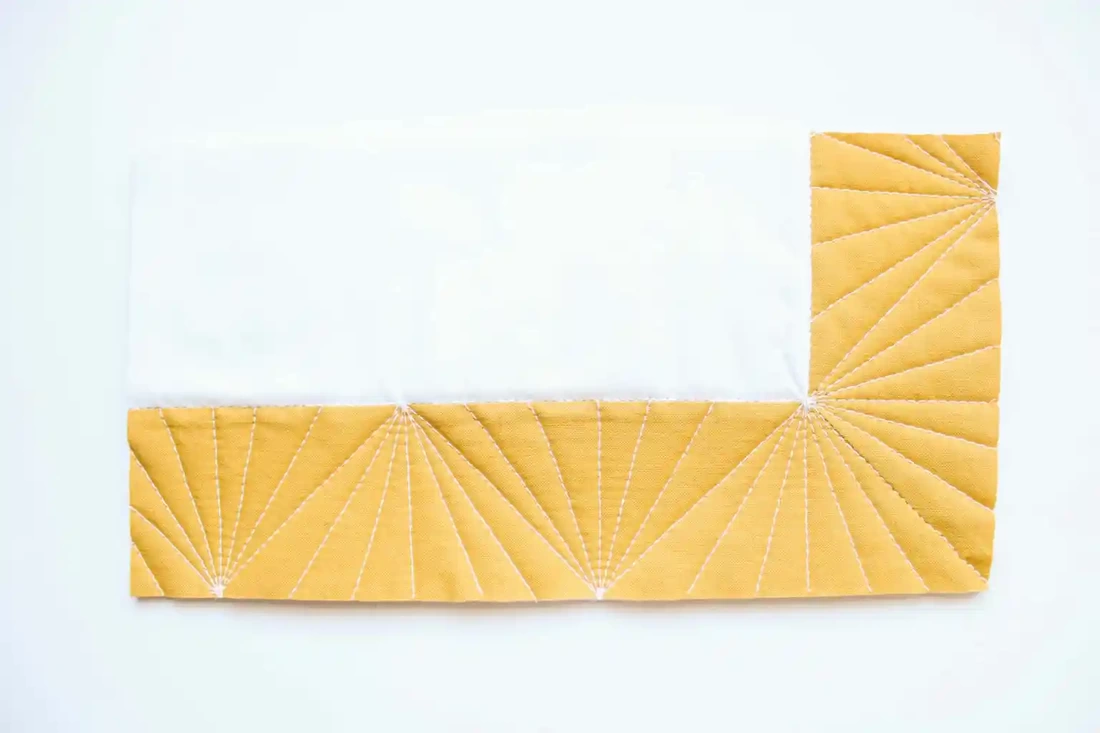
The Fan - Walking Foot Border Design
This border quilt idea is fun as it kind of gives you an unexpected triangle design that you really don’t see often. This design uses an “entry level” dot to dot technique, and if you’ve never heard of “dot to dot” before, all it means is that it uses geometric shapes, whether they are from the quilting or the piecing and uses corners of the shapes as “dots”. Make different shapes connecting them between “dots” and fill them in after! To get this design, mark out your zig zag and quilt it first. Then go back in and start at the point where the zigzag turns, quilt 5 lines out to the opposite edge of the border, fanning your lines as you go! Repeat the process for each turn in your zig zag. Northern California quilters love this show, but some of us didn't make it this year due to concerns about Covid. I found this video online that she walks through the Display of Quilts so anyone can see them virtually. The video is long (an hour and a half) so I may watch it over several sittings. Still, I appreciate the opportunity to see them and may even find some new ideas to try.
This is a great video to know what you can be doing to help keeping your sewing machine running well. You still need your repair shop, and periodic maintenance through them, but these are easy tips you can do yourself to keep things running smooth. Well worth the watch, and might just save you frustration and money in the long run.
Recently our group has been discussing spray basting quilts with the pro and cons. Another alternative is to make your own homemade basting spray. It saves a lot of money, and has no chemicals to be concerned about. It is a different process to use, but it might just be something you want to try.
A big thank you to one of our members, Linda, for sending me a link to this video! Linda took notes on the ingredients: 1/2 t salt dissolved in 2 Cups water on the stove. Add to that; (3-4 T Flour dissolved in 1 Cup room temp water, shake or stir so no lumps ) and whisk till gelatinous. Cool to room temperature and pour into a spray bottle (large enough to hold 4 cups of liquid). Add 1 cup of rubbing alcohol* to that and shake. Will need to be shaken every time you use it. And a few notes from the comments on the video:
I am adding this useful video below that shows how to use the spray successfully with your projects. You can iron the quilt to dry faster, but for larger projects laying it out to air dry makes it much easier.
---Ann I happen to store some of my scraps as 5 inch squares. So, this attractive and easy block is perfect for some of my projects. Watch and you may want to start using this block too!
Thanks, Ann Sometimes a little pop of color with a flange on your binding can really make your quilt pop. This video shows an easy method to accomplish that.
I really liked this quilt by Yoan Sewing Studio on You Tube. I have some Layer Cakes that I wasn't sure what to do with, so decided that one of them could be make into this quilt. So, of course I am also sharing it here for others that may want to make it.
... Here is a link to her website page with supplies, and a pattern to download https://www.yoansewingstudio.com/quilting/island-path-layer-cake-quilt-pattern It is amazing how many orphan blocks that can accumulate. This video shared a process to put a mixture of blocks together to create an attractive quilt. She finishes the quilt top with a blanket style with a furry type back because that is what her family likes, but the top is attractive enough to add a traditional back and binding and be proud of it that way too. Enjoy! At our 2:00 Zoom meeting today, instead of sharing a video with a quilt tip, we asked members to share their favorite quilt ruler. Lots of fun and we all learned something new from each other. Thank you to all our members that participated! Here are some of the results:
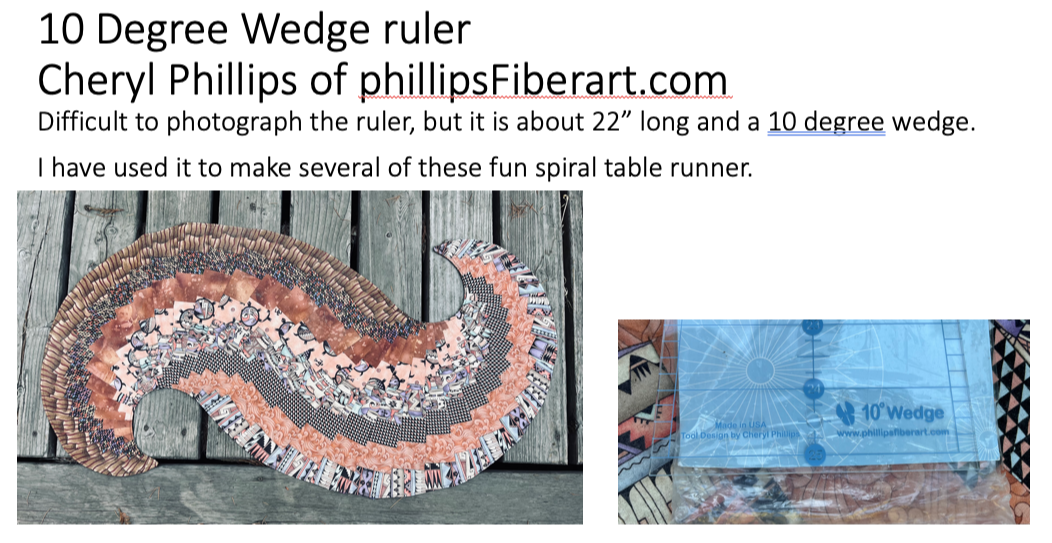
Gina S:
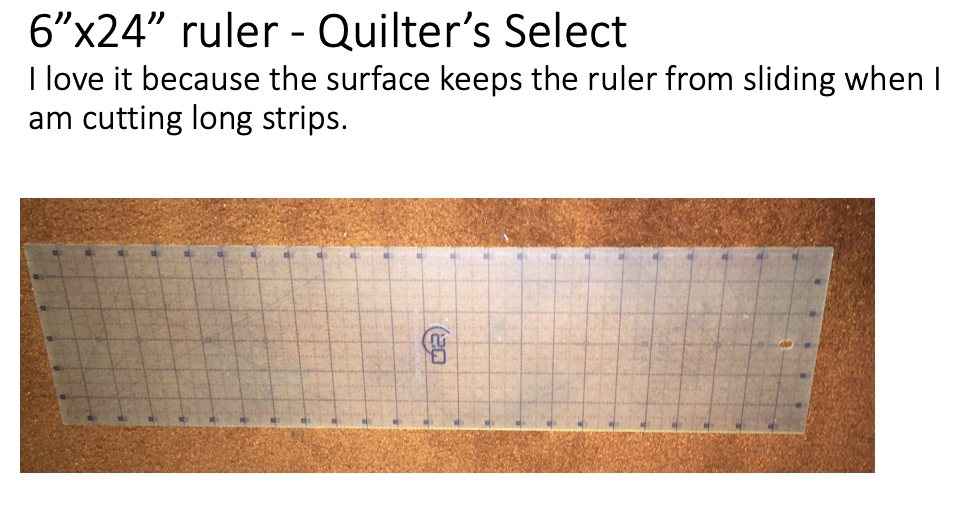
From Janice J. (unable to attend, but sent us this information)
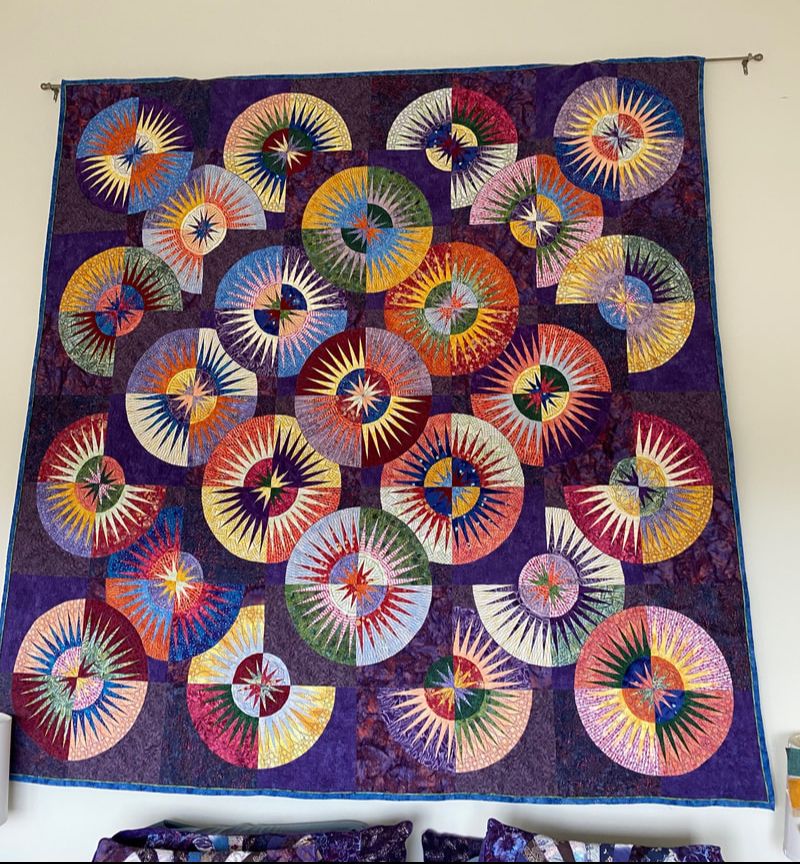
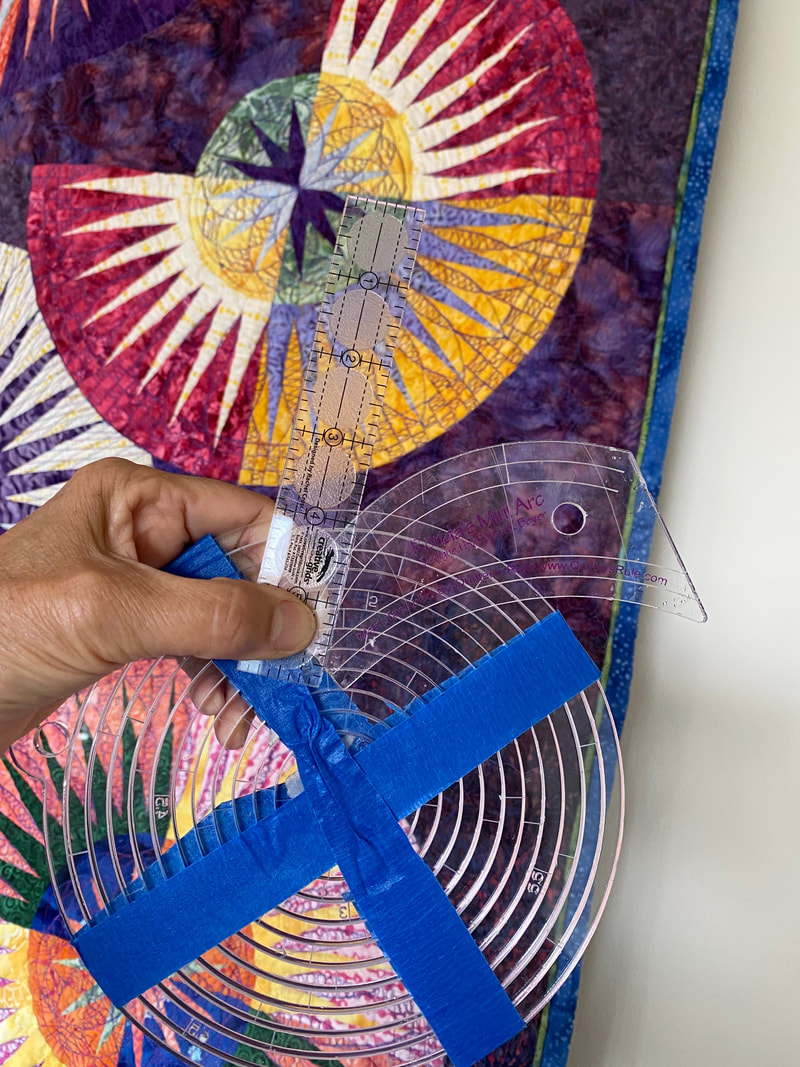
Elaine R. (unable to attend, but sent us this information)
This entire quilt was ruler quilted with these 3 rulers. 25 New York beauties! Rhonda’s mini arc is my all time fave. I got it @ Quilter’s rule online, which is where I got the nesting circles. The little straight edge is not a quilting ruler as it’s not wide width but I managed to not break a needle when I used it. It’s from Creative Grids.
|
Virtual QuiltersWe welcome quilters from any area to join our free virtual quilt group. If you have questions, contact Ann@VirtualQuilters.com Archives
April 2024
|
||||||||||||
 RSS Feed

Virtual Quilters
www.VirtualQuilters.com
Contact us by email at Ann@VirtualQuilters.com
www.VirtualQuilters.com
Contact us by email at Ann@VirtualQuilters.com