|
It is amazing how many orphan blocks that can accumulate. This video shared a process to put a mixture of blocks together to create an attractive quilt. She finishes the quilt top with a blanket style with a furry type back because that is what her family likes, but the top is attractive enough to add a traditional back and binding and be proud of it that way too. Enjoy!
0 Comments
At our 2:00 Zoom meeting today, instead of sharing a video with a quilt tip, we asked members to share their favorite quilt ruler. Lots of fun and we all learned something new from each other. Thank you to all our members that participated! Here are some of the results:
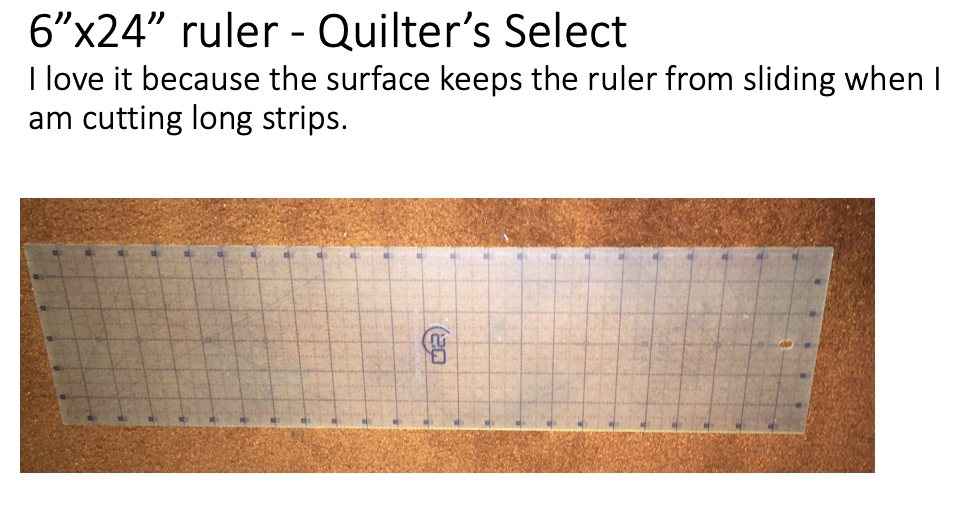
Gina S:
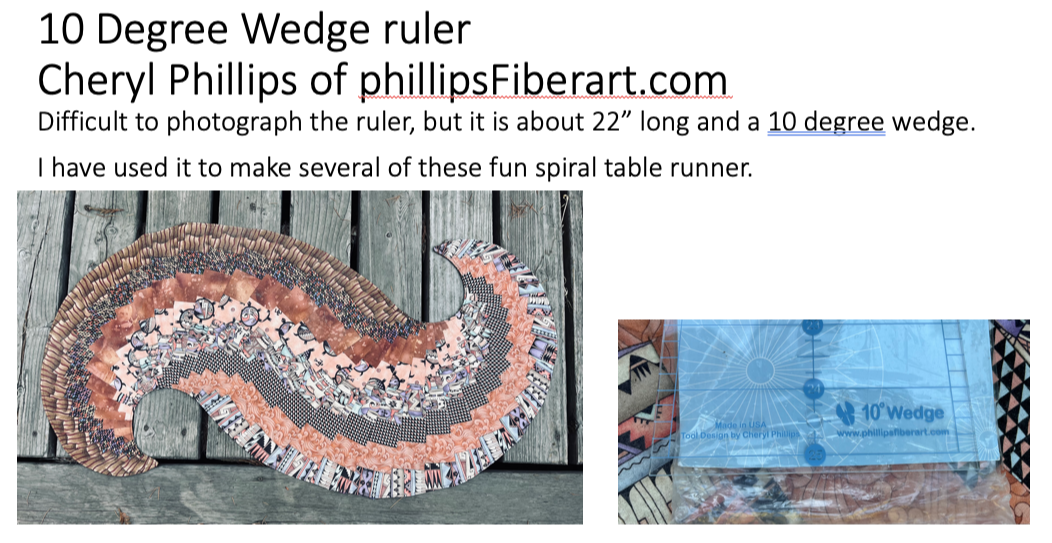
From Janice J. (unable to attend, but sent us this information)
Elaine R. (unable to attend, but sent us this information)
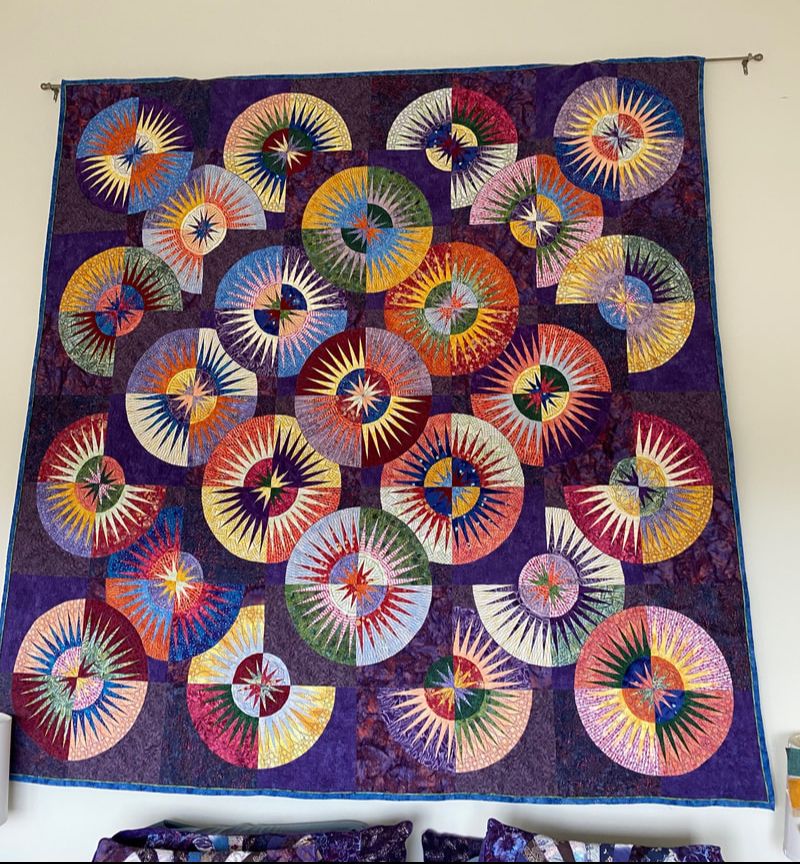
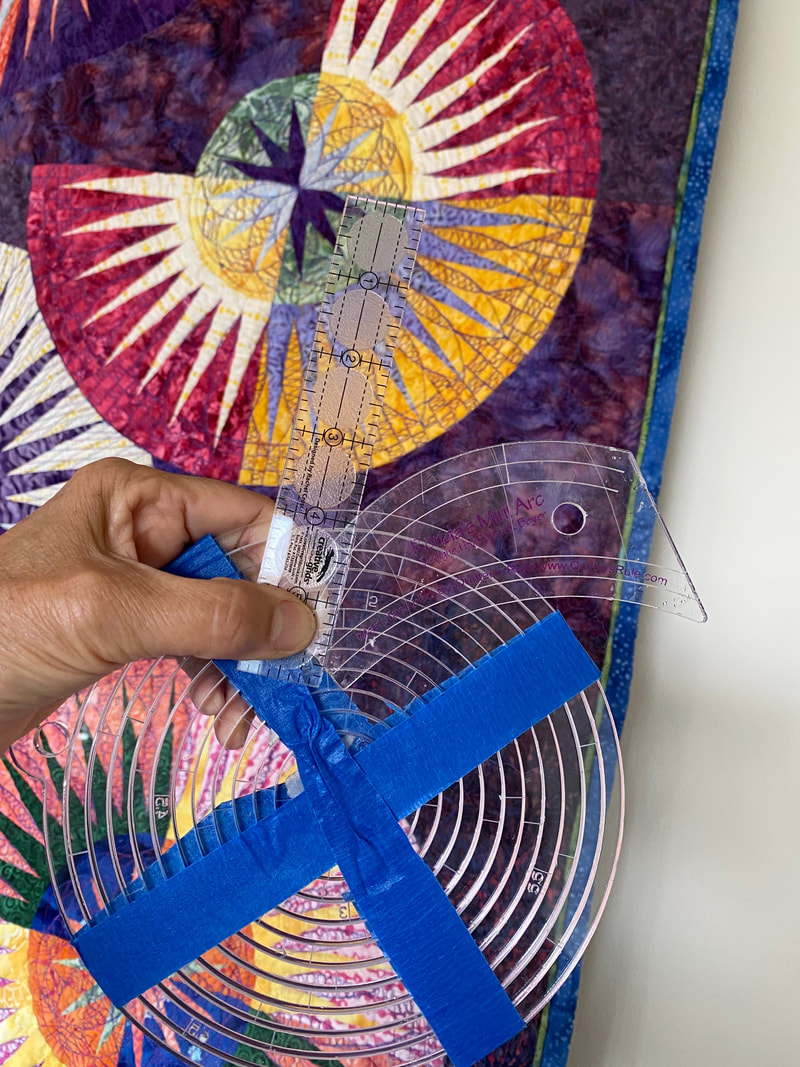
This entire quilt was ruler quilted with these 3 rulers. 25 New York beauties! Rhonda’s mini arc is my all time fave. I got it @ Quilter’s rule online, which is where I got the nesting circles. The little straight edge is not a quilting ruler as it’s not wide width but I managed to not break a needle when I used it. It’s from Creative Grids.
A big thank you to one of our members, Marilyn D, for suggesting a video for us. I love when I get ideas to share from our members! I understand that Y-seams are a struggle for a lot of quilters, and this video sure makes it look do-able. This quilt tip falls under the category of something I didn't realize what I didn't know. I am guilty of just using what batting I happen to have, and just assumed they were all pretty much the same. So hope you enjoy learning a little bit more, I sure did! --Ann Like many of our members, I have loved sewing since I was a kid. Sewing anything curved is often more of a challenge, and so I appreciated how this project made it so easy. Krista Moser has a tutorial that makes the fussy steps totally easy. For example, rather than doing a turned hem, used rick-rack to stitch down, fold over, and topstitch. So cute and so much easier all in one! I also loved the way she added the elastic to hug the bowl or dish. Rather than fishing the elastic through a channel, which can be a pain, she just zigzags over the top of it, and done. Hurray! Anyway, this is a fun project to take your dishes to potlucks and picnics, but I may make these to cover dishes when we eat on the patio. I can imagine some of the fabric in my stash would look great. To see her the post with complete instructions and photos (on her website) Click Here ---Ann 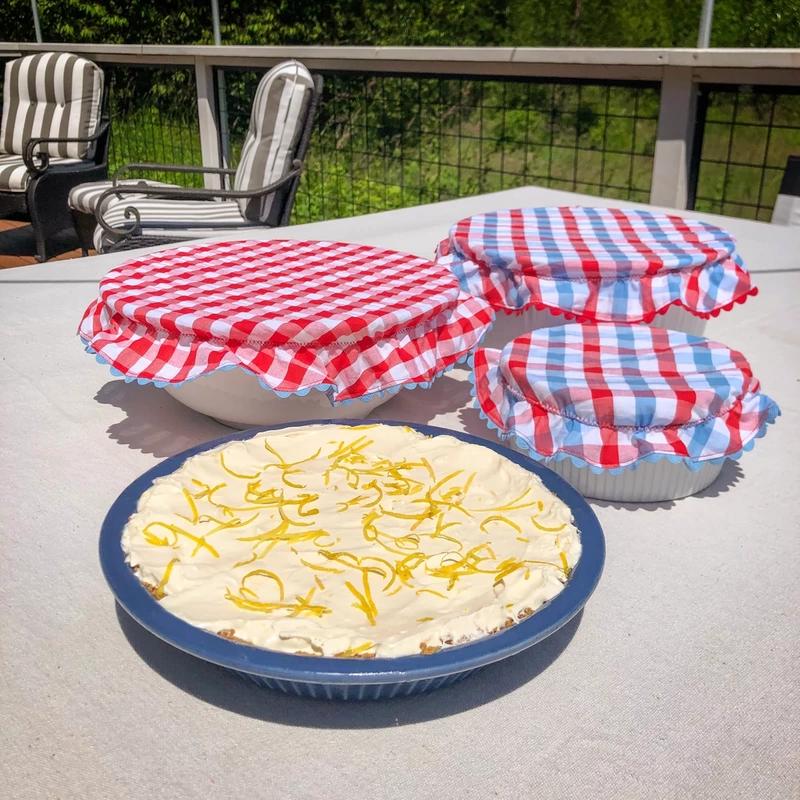 The last clue on this year's Mystery Quilt went out at the beginning of June, and our members are starting to send me photos of their completed tops. Very exciting! See the slide show below: I started out as a "slow" quilt maker, and as I got more experienced I have gradually improved. So, I appreciate tips like these that might make my creative journey and little faster and more fun. Ann This easy quilt using large blocks is perfect to use fabrics from your scraps or your fabric stash. I love the combination of stripes and friendship stars. I also think it could be fantastic with other colors too., so use your creative juices to have some fun. No pattern needed, the video shows you everything you need to know. One of our members has made several of this quilt pattern using scraps from her other quilts. Bonnie Hunter has this as a free pattern on her website, and it is called Dancing Nine Patch. Bonnie actually has quite a few free patterns, so well worth taking a look to see if you find any other quilt patterns you would like to try. A lot of our members love Bonnie's quilt patterns. To see her Free Patterns, Click Here and then scroll down to the "Dancing Nine Patch" section to download the pattern. 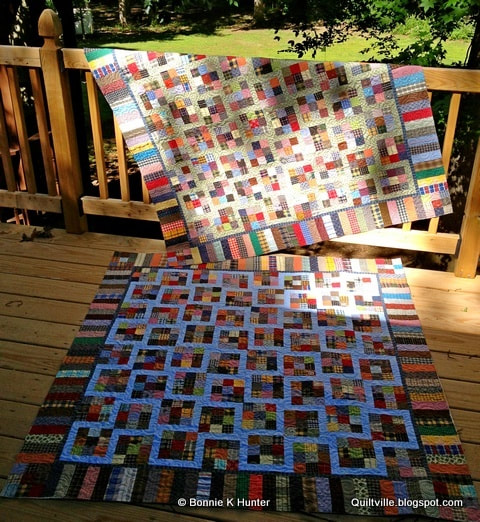 This video shows how to make a quilt making blocks with collected theme fabrics. Turns out very easy and cute, and the video is so good you can probably make it from just watching the video. You can also find the pattern and her website to learn more. There are a lot of patterns and ideas on her website. She is in New Zealand, but her patterns are instant downloads. To see her website, Click Here One of our members, Linda V., found this video that she found interesting. The lesson gives a method for ruler cutting curves (circles) with the least amount of waste. Video by Karla Alexander via Creative Grids This fabulous group of pro Quilt Teachers keeps giving us more great content to watch and learn. You won't want to miss their current series of Studio Tours by some of their teachers! All free and available on their website. Click Here --Ann Ready for a studio space makeover/reorganization? Be sure to check out Global Quilt Connection brand NEW Studio Tour videos featuring the creative spaces of these quilt artists/teachers: Jenny Lyon @jenny_quiltskipper Patricia Belyea @okanarts Michele Crawford @flowerboxquilts MJ Kinman @mjkinman_textileartist Cindy Grisdela @cindygrisdelaquilts Sheri Cifaldi-Morrill @wholecirclestudio  I always love improv techniques, and I certainly love how this one looks. I thought it might spark come creative ideas for other quilters too. Enjoy! PS- If you are interested in knowing more, this pattern is in Karen Eckmeiers book "Wiggles and Waves" available on Amazon.com. An interesting story and a wonderful quilt! I thought some of our quilters would enjoy knowing about this product. How fun it would be to custom color and write your information on the label, each one unique. They remind me of the beautiful coloring books that are popular. Besides, we spend many hours making our quilts creative, so why not the label too? I have recently taken an online course on Walking Foot Quilting, and love how quick, easy, and beautiful it can be. This short video shows 4 designs that you might consider to do some yourself, or catch up on your projects. I would like to add that in the course I took, they suggested a stitch length of 2.75, and of course you don't have to make the lines so close together. For a bigger project, I often use straight lines that are 2 or 3 inches apart, or sometimes even more. You still get the great look if appropriate to the dimensions of the project, and it takes a lot less time. --Ann Thank you to one of our members, Mary Ann, for suggesting this video on cutting fabric for bias binding. The video is easy to follow and gives you another technique to make your project easier. 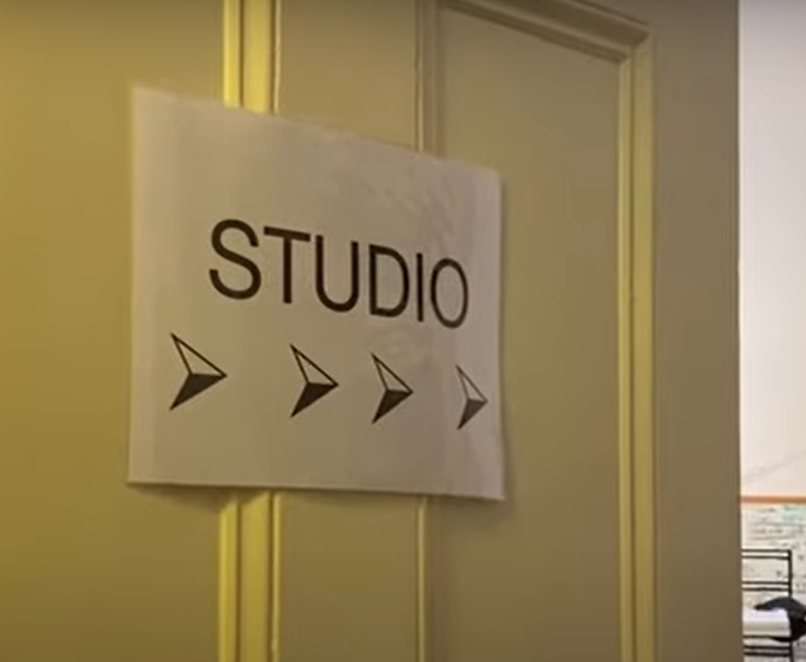 Global Quilt Connection is a wonderful group of quilt teachers that offer classes to quilt guilds and individuals online. They just released these Studio Tours by 9 of their teachers. There are 3 teachers per video. Included are tips they learned along the way building their sewing area. You can learn more about them at www.GlobalQuiltConnection.com.
Great tip for a tool that can be used for both binding and borders. They also now make an XL version for larger borders and it does a lot also! See the second video below for a demonstration of that. |
Virtual QuiltersWe welcome quilters from any area to join our free virtual quilt group. If you have questions, contact Ann@VirtualQuilters.com Archives
May 2024
|
 RSS Feed

Virtual Quilters
www.VirtualQuilters.com
Contact us by email at Ann@VirtualQuilters.com
www.VirtualQuilters.com
Contact us by email at Ann@VirtualQuilters.com