VIRTUAL QUILTERS
  • Home
  • Join
  • Blog
  • Community-Service
  • About
  • Member Login
  • Home
  • Join
  • Blog
  • Community-Service
  • About
  • Member Login

Tips: How to do Quilt Facings with Mitered corners!!!

2/22/2021

1 Comment

 
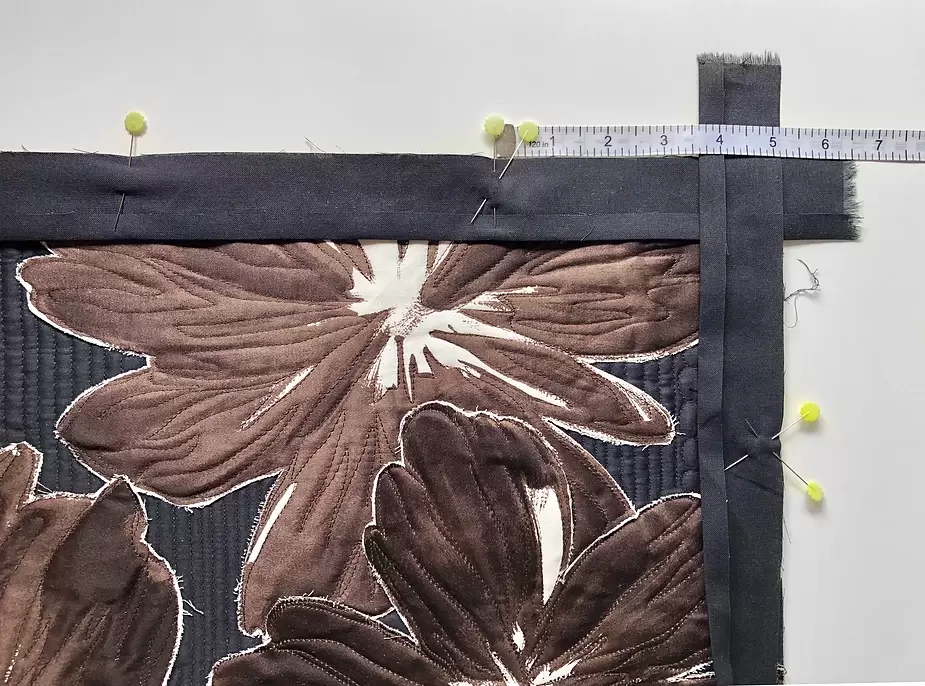
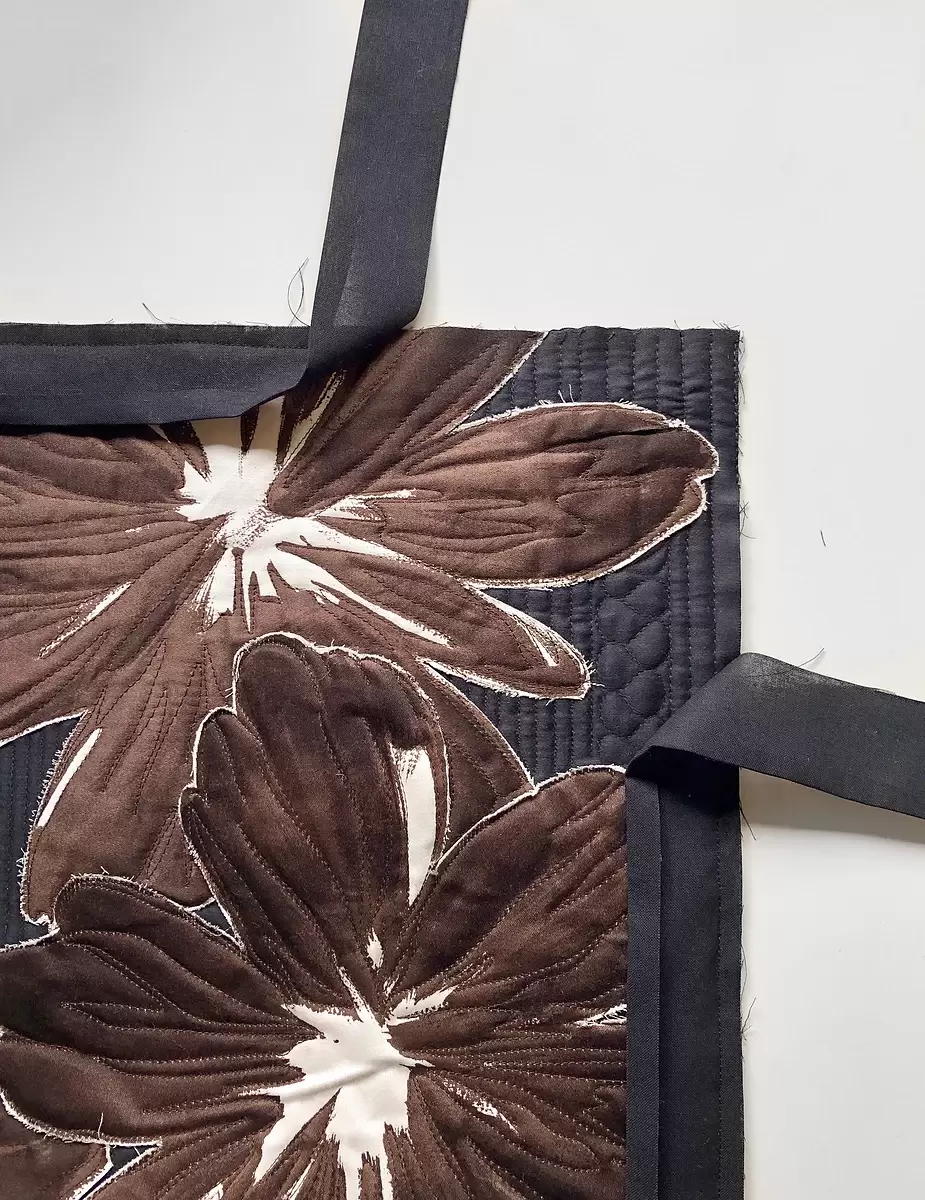
Article from the blog of Krista Moser.  To see her original post, Click Here
Have you ever wanted to try facing a quilt instead of binding it? This works well for artsy style quilts that are going to be on display. There are a few good methods for doing facing instead of binding, and I thought I would show you my favorite method... the mitered way!
CLICK ANY PHOTO TO SEE A LARGER IMAGE​
Picture
One reason to use the mitered method, it is less bulky giving you a nice sharp corner. And it can be manipulated a little easier, giving you a tight fit when you turn the facing to the back (I’ll explain more on that below).
Picture
One reason to use the mitered method, it is less bulky giving you a nice sharp corner. And it can be manipulated a little easier, giving you a tight fit when you turn the facing to the back (I’ll explain more on that below).

Picture
Join the strips end to end with a diagonal seam on the 45 degree angle.
Picture
Trim away the excess from the seam, and press each one open. Then, press one edge under about ⅜” all the way down the length of the strip.

Picture
From the front of the quilt, lay the raw edge of the strip along the raw edge of the quilt. Give yourself at least a couple inches extra, hanging over the ends of the quilt, before trimming the strip off. Run the strip down the sides, giving yourself a couple inches on both ends there too. Pin the strips into place, but do not pin all the way to the corners. I stopped short about 5” from the corners.
Picture
Stitch all the way around the quilt with a ¼” seam allowance, stopping 5” from the corner, and starting again 5” down the next side.

Picture
Take the quilt to the ironing board with its flapping tails of facing at each corner. Fold the facing strips back to create a miter at each corner, and press a sharp crease. Notice how I manipulated the strips to gap about ⅛” at the folded edge; it’s not a perfect 45 degree angle. When I sew the two sides together, following that crease, it creates a little tension on the inside edge once it’s been folded around to the back.
Picture

Picture
I used that crease as my guide and cut ¼” beyond it on both facing pieces.
Picture

Picture
Pin the two facing pieces together, matching up their creases and stitch, backstitching at both the start and stop.
Picture
Press that seam open, and pin the facing to the quilt. Stitch into place.

Picture
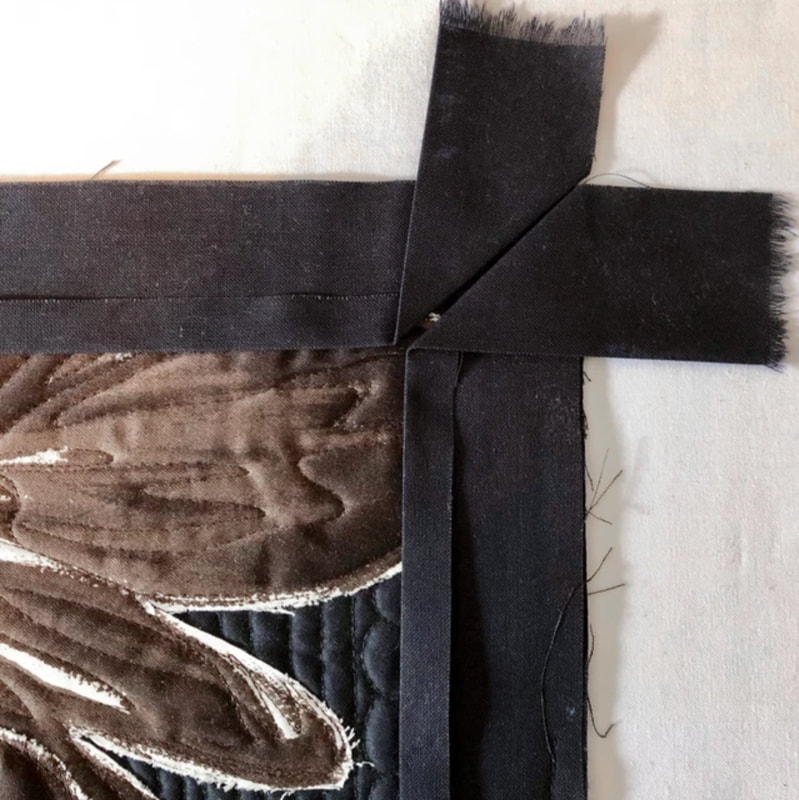
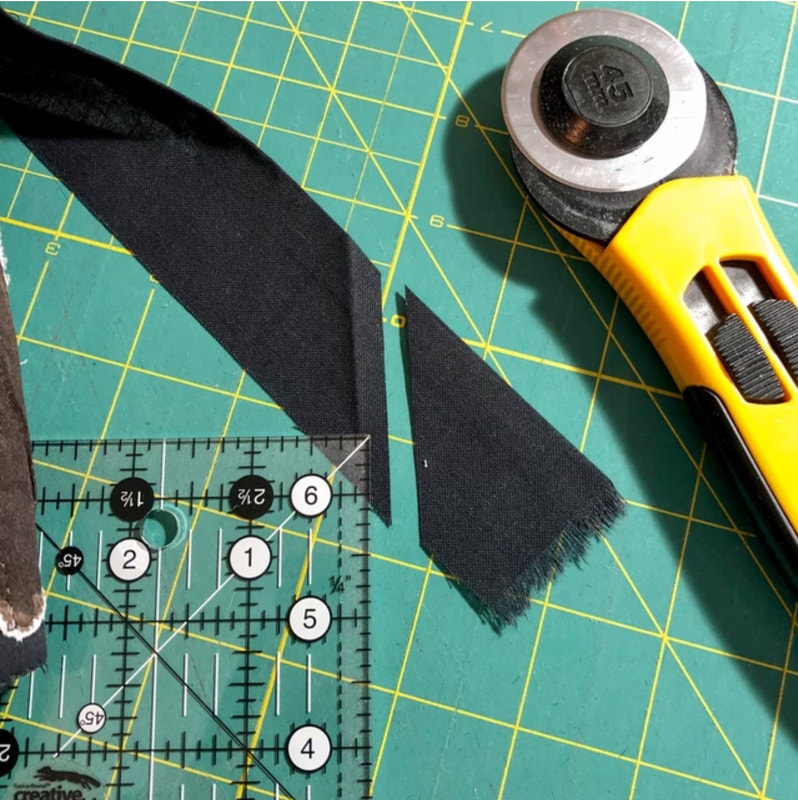
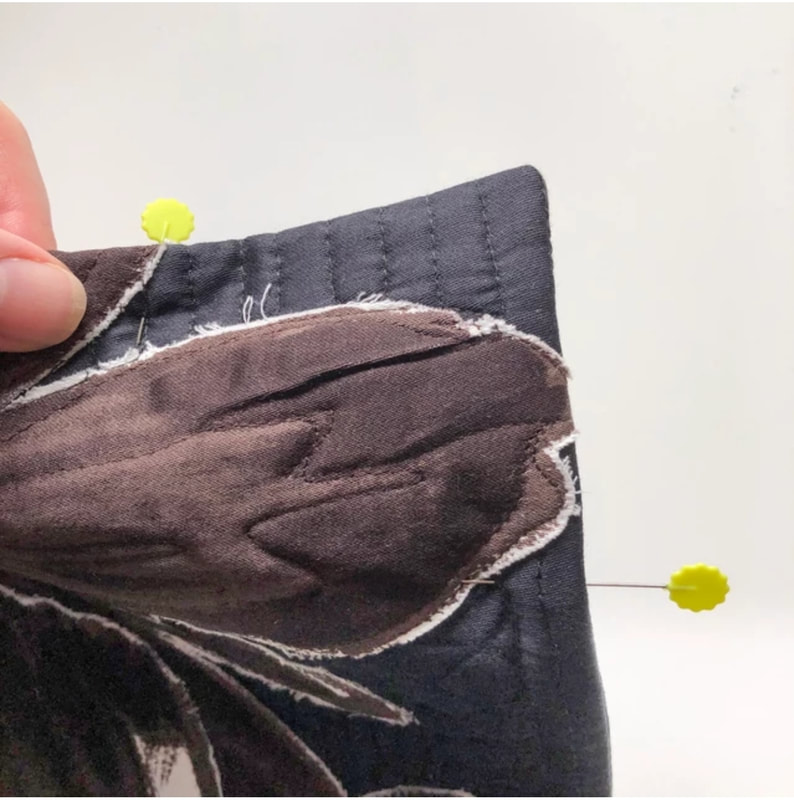
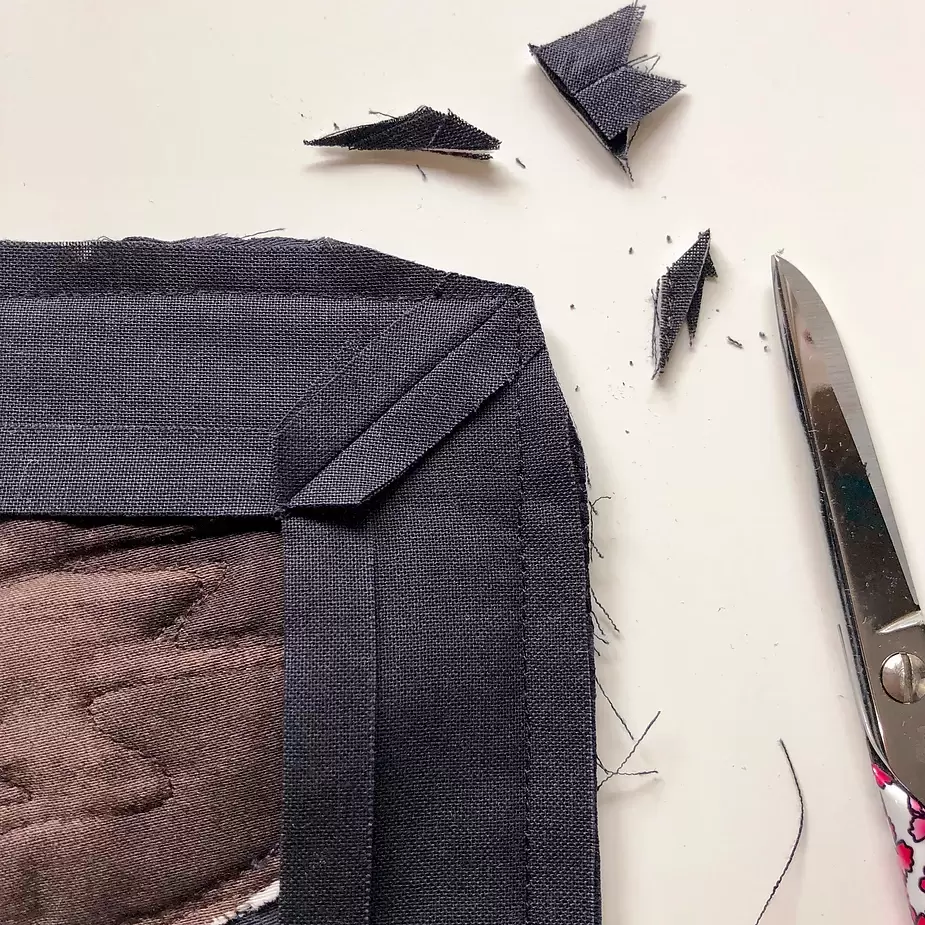
Trim the corner down, but do not cut through the stitch line.

Picture
Turn the facing corner around to the back of the quilt, using your fingers to work the edges of the quilt into place. It may be necessary to use a semi-pointy object to poke out the corner of the quilt and really get a nice edge. Because that extra ⅛” gap is pulled snug, it helps hold the facing to the back of the quilt so it doesn’t roll around to the front of the quilt.
Picture

Picture
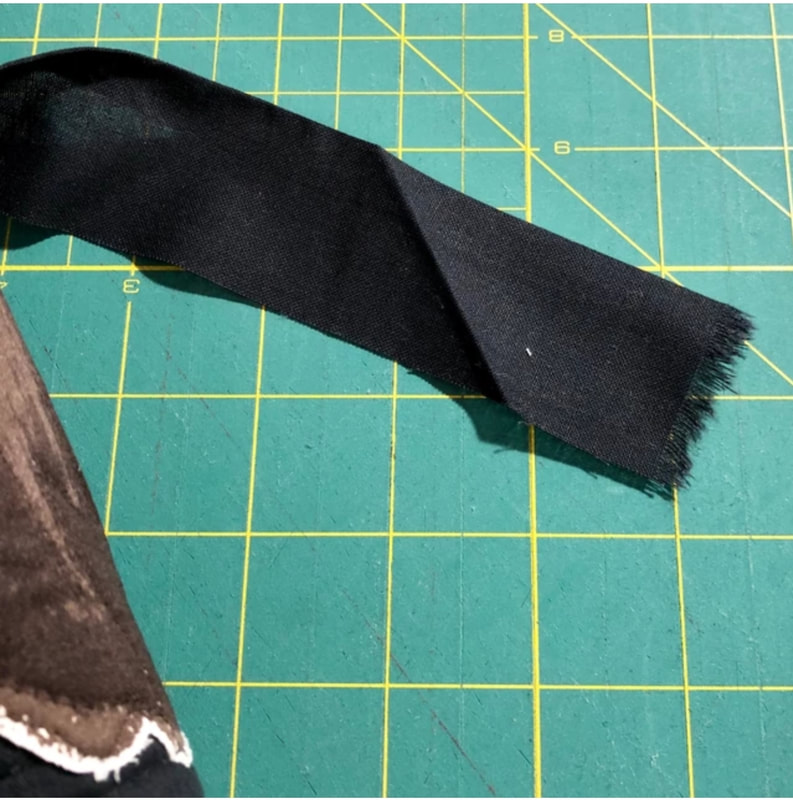
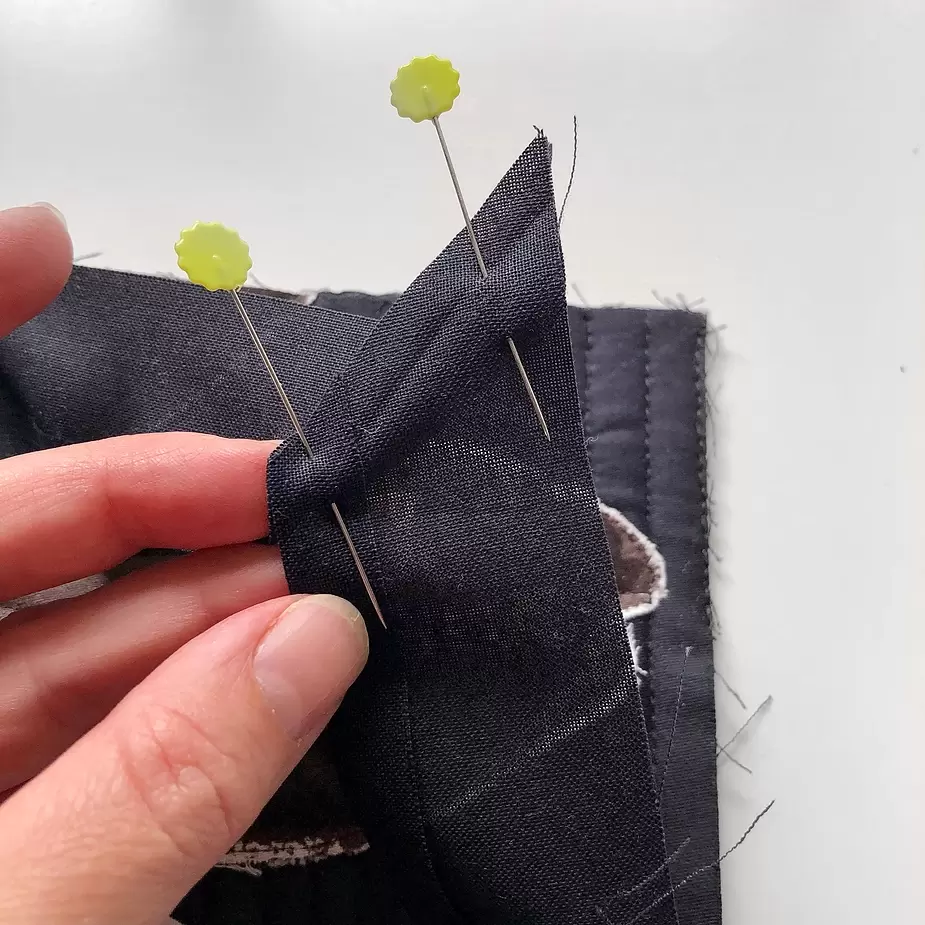
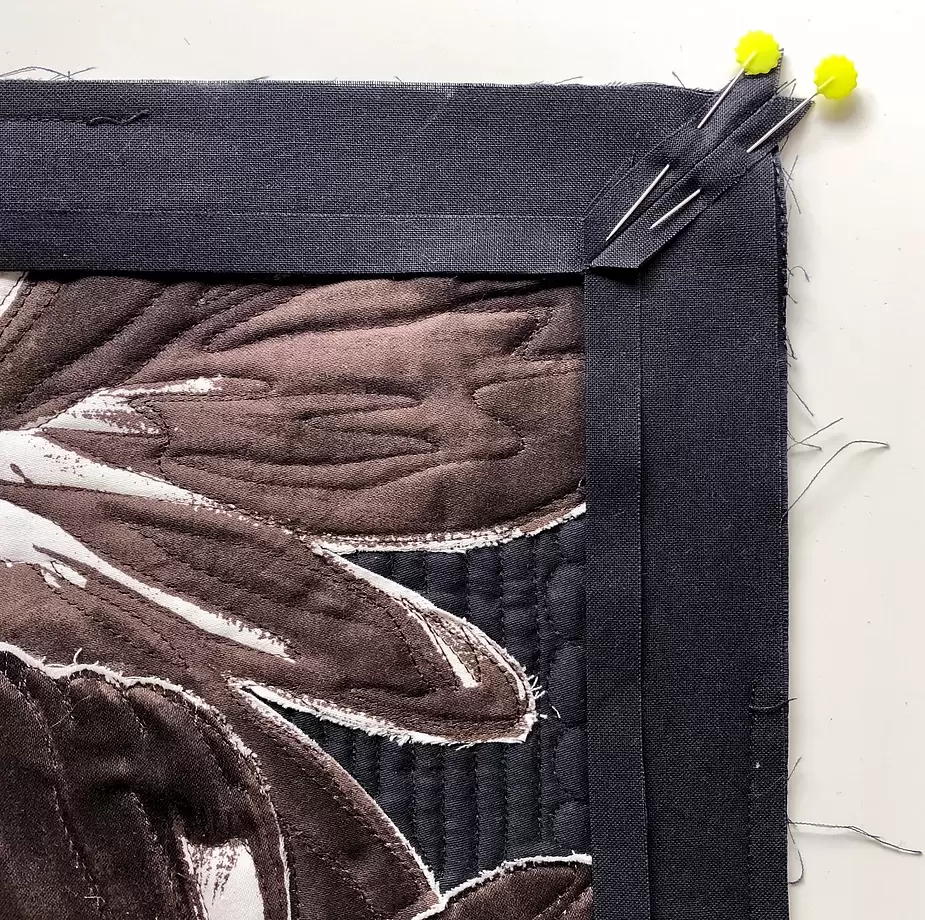
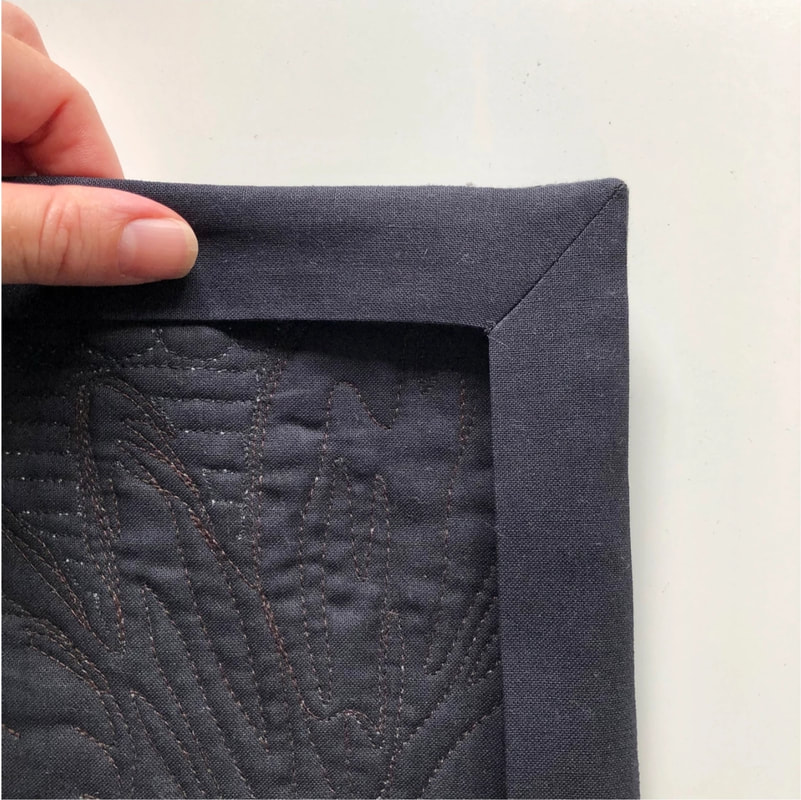
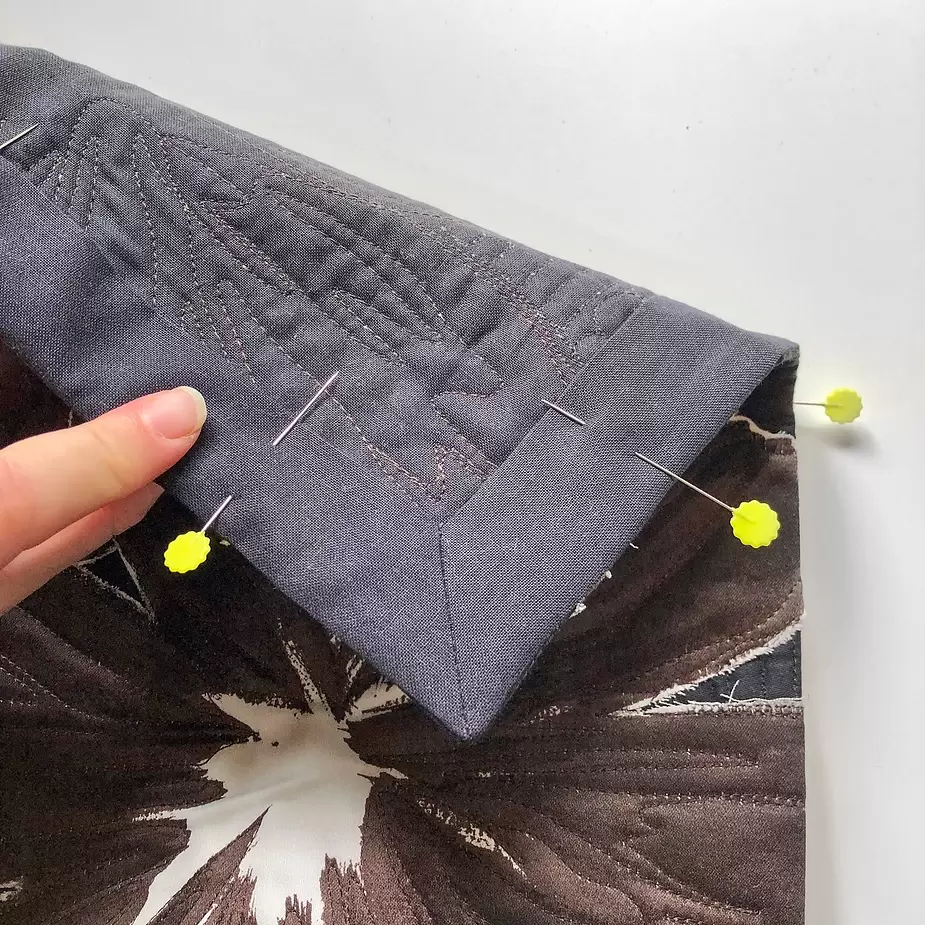
Press the facing down flat along the back, using the nose of the iron to help manipulate the fabric into place. Then pin, pin, pin!

Picture
Well, there you go! I’m off to do a lot of hand stitching :)
1 Comment
Phoenix Sex Clubs link
12/25/2024 08:37:25 pm

Good rreading your post

Reply


Leave a Reply.

    Virtual Quilters

    We welcome quilters from any area to join our free virtual quilt group.  If you have questions, contact [email protected]

    Categories

    All
    Bias
    Block Lotto
    Color Theory
    Cutting Techniques
    Design Wall
    Free Patterns
    Glue Basting
    Interviews
    Quilt Blocks
    Quilt Exhibits
    Quilt Patterns (Free)
    Quilt Tips Etc
    Quilt Tools
    Sandwich Quilts
    Scrap Quilts
    Shopping Tours
    Telephone Game
    Workshops

    Archives

    May 2025
    April 2025
    March 2025
    February 2025
    January 2025
    December 2024
    November 2024
    October 2024
    September 2024
    August 2024
    July 2024
    June 2024
    May 2024
    April 2024
    March 2024
    February 2024
    January 2024
    December 2023
    November 2023
    October 2023
    September 2023
    August 2023
    July 2023
    June 2023
    May 2023
    April 2023
    March 2023
    February 2023
    January 2023
    December 2022
    November 2022
    October 2022
    September 2022
    August 2022
    July 2022
    June 2022
    May 2022
    April 2022
    March 2022
    February 2022
    January 2022
    December 2021
    November 2021
    October 2021
    September 2021
    August 2021
    July 2021
    June 2021
    May 2021
    April 2021
    March 2021
    February 2021
    January 2021
    December 2020
    November 2020
    October 2020
    September 2020
    August 2020

    RSS Feed

Picture
Virtual Quilters
www.VirtualQuilters.com
​Contact us by email at [email protected]